
API Keys Walkthrough
Step 1: Open Account
Account is near the bottom of the left menu. It opens on a row of tabs.
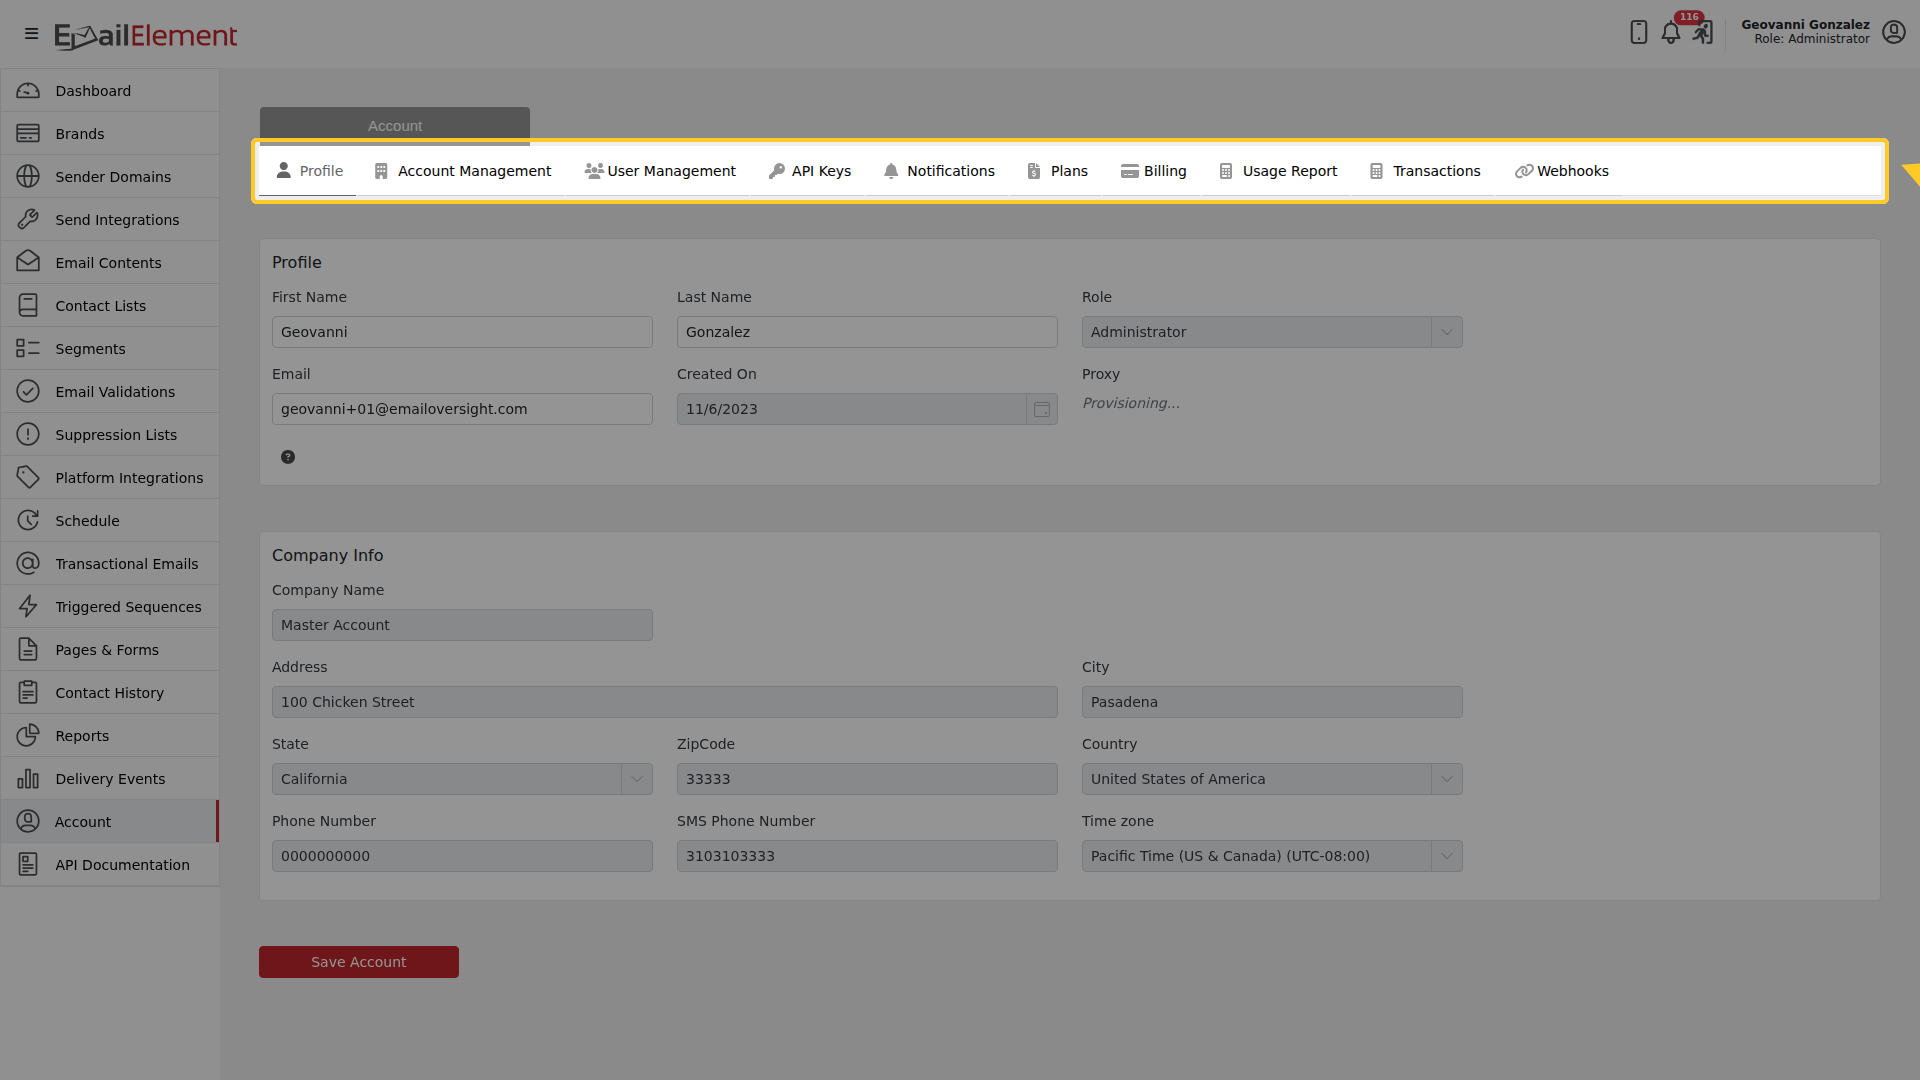
The tabs are Profile, Account Management, User Management, API Keys, Notifications, Plans, Billing, Usage Report, Transactions and Webhooks. Administrators see all of them.
Step 2: Open API Keys
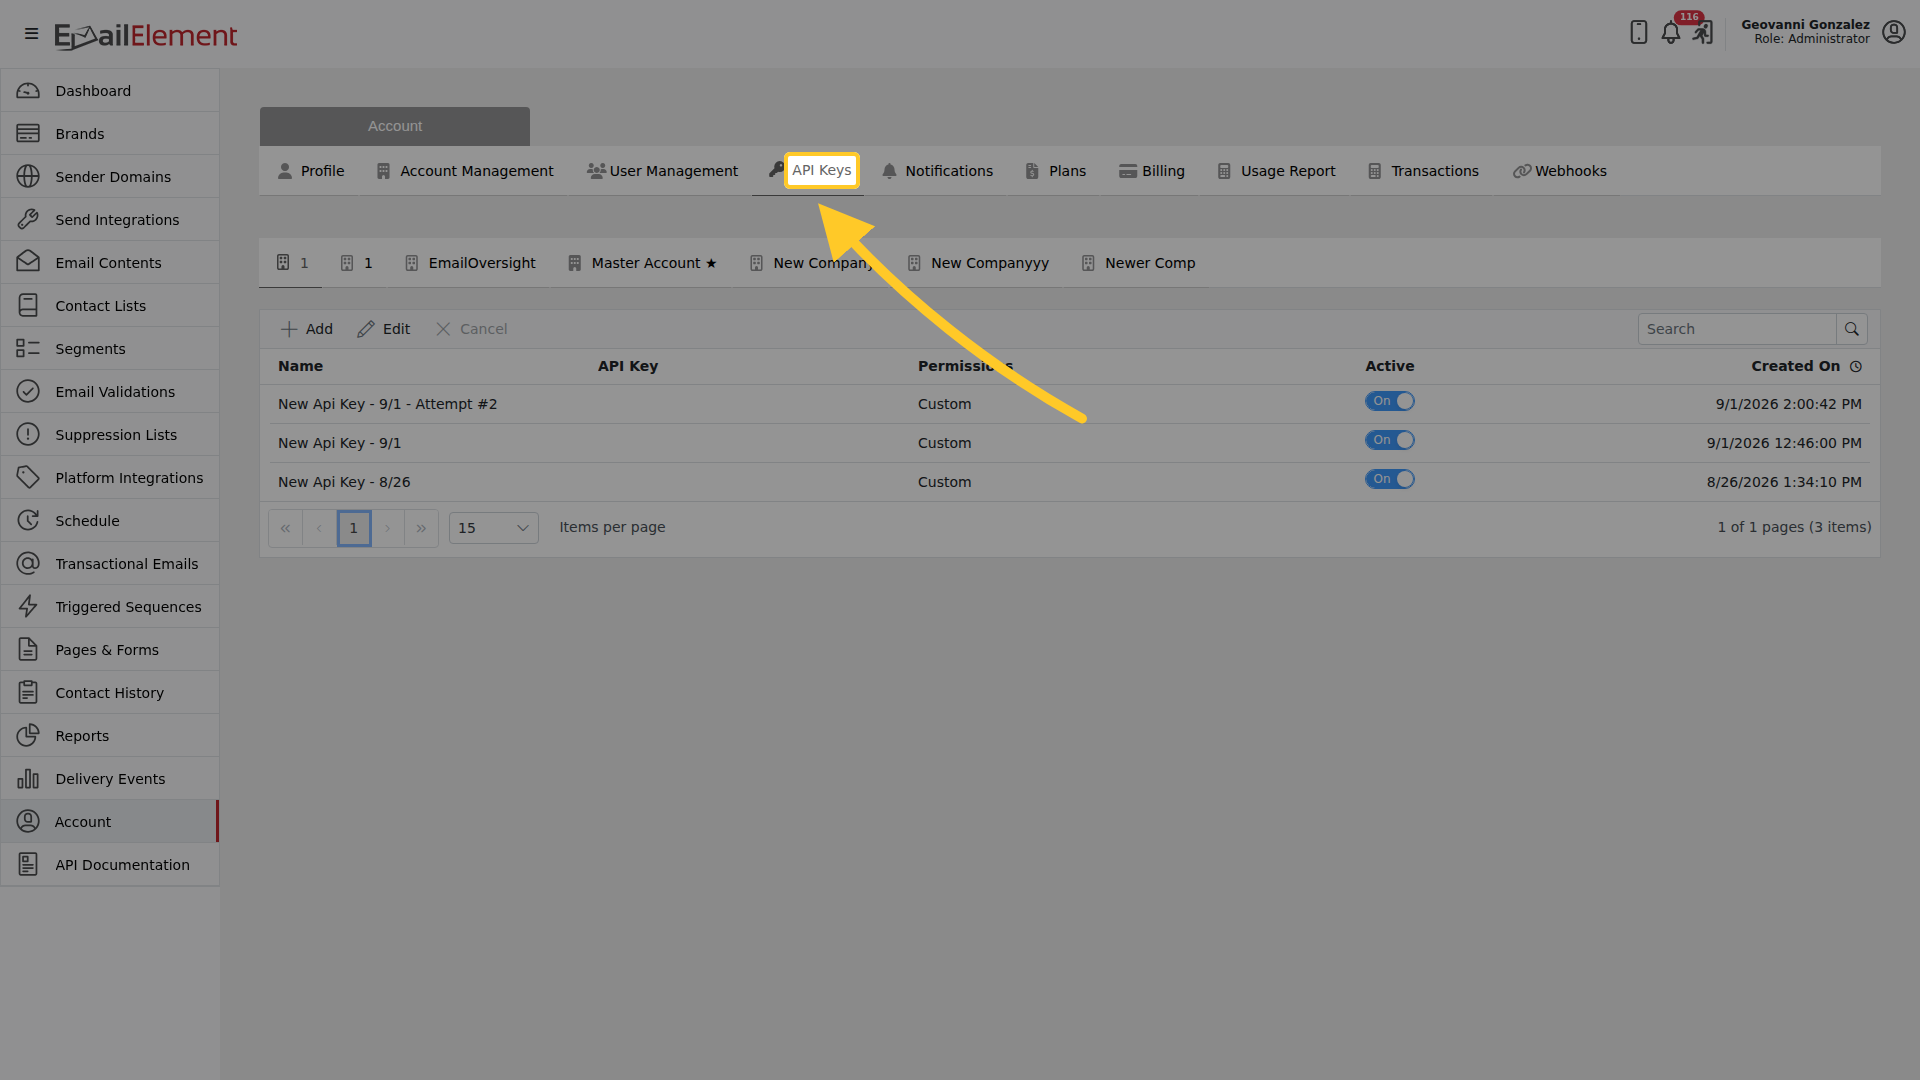
The grid lists Name, API Key, Permissions, Active and Created On. Above it are Add, Edit and a search box.
Step 3: Add a key
Add opens the dialog.
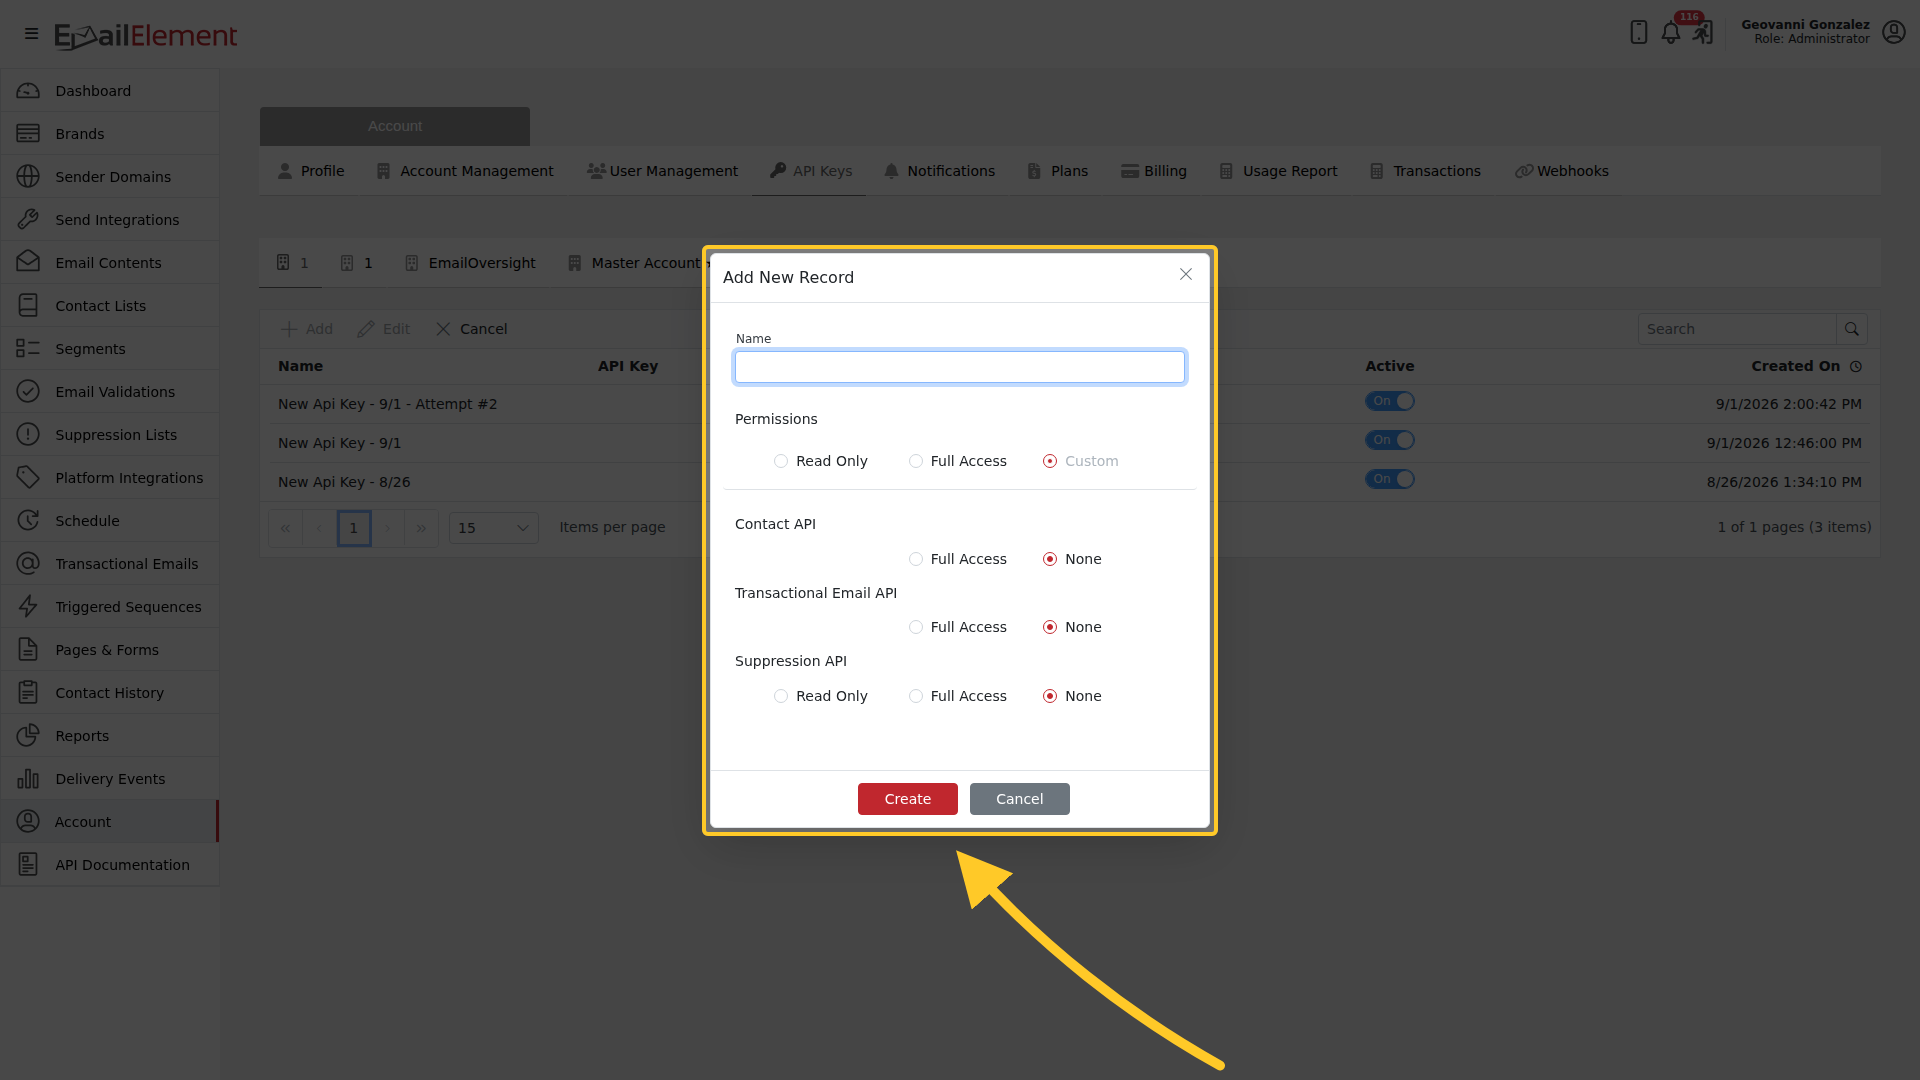
Name is yours to choose and is worth making specific, because the grid is how you find a key again later.
Permissions sets every API at once:
| Setting | What it does |
|---|---|
| Read Only | Read access wherever an API offers it |
| Full Access | Full access to every API |
| Custom | Each API set on its own, using the rows below |
Under Custom each API takes its own level:
| API | Choices |
|---|---|
| Contact API | Full Access, None |
| Transactional Email API | Full Access, None |
| Suppression API | Read Only, Full Access, None |
All three start at None, so a new Custom key can do nothing until you grant something.
Create saves it.
Using the key
Send it as the x-api-key header on every request. A missing or unrecognised key is a 401. A key that is recognised but lacks the permission for that API is a 403 — edit the key and set that API's permission.
Turning a key off with the Active switch is the quickest way to stop it being used, and it keeps the row so you can see what it was.