
Complainer UI Walkthrough
Overview
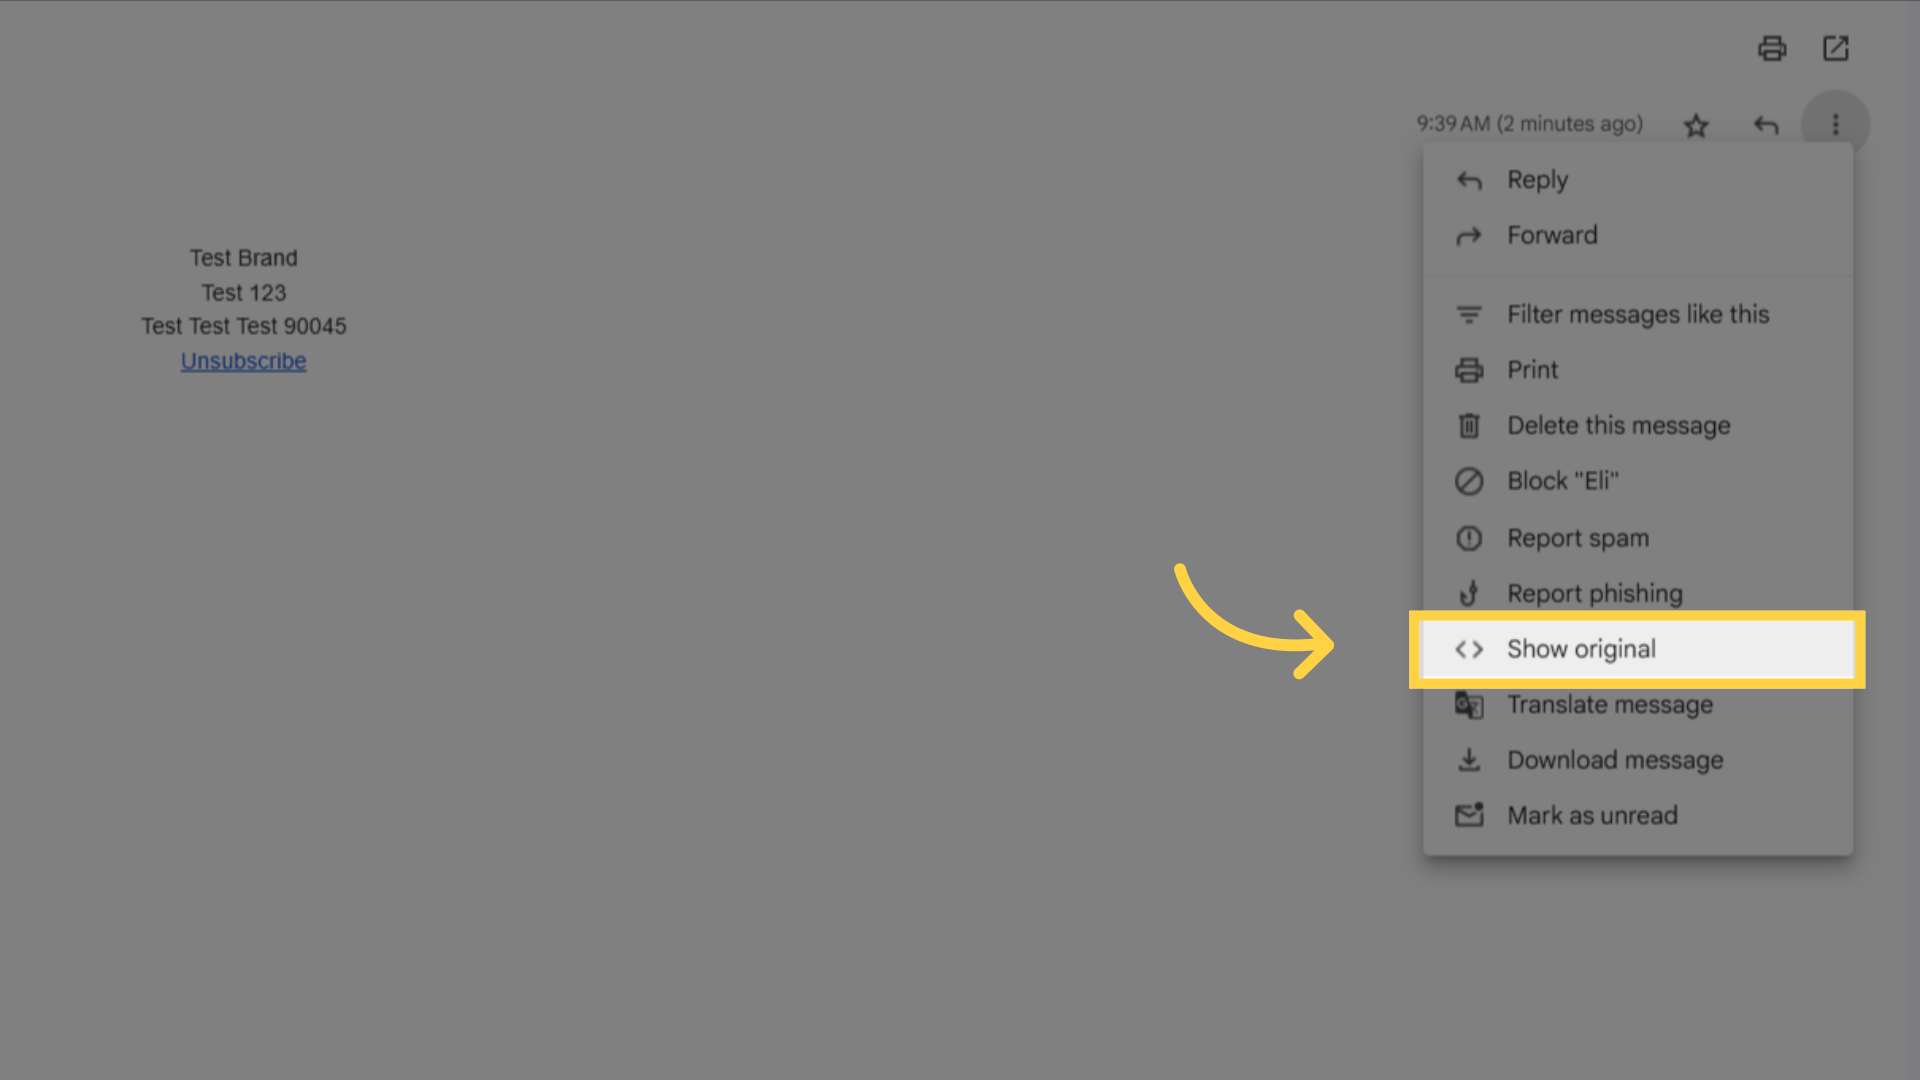
The Complainer UI allows you to manually process spam complaints by pasting raw email content. EmailElement extracts the recipient, identifies the contact, and adds them to the appropriate suppression list. This is useful when you receive complaints from third-party services that do not integrate directly with your ESP's feedback loop.
Sources of Raw Email Complaints
Raw email complaints can come from:
Spamhaus — sends abuse reports with full email headers and body
LashBack — monitors suppression list compliance and sends violation reports
Direct inbox complaints — a recipient forwards the spam email to you or your abuse address
ISP abuse desks — ISPs forward the original email with complaint details
Feedback loop services — some feedback loops provide the raw email content
Step 1: Access the Complainers Tab
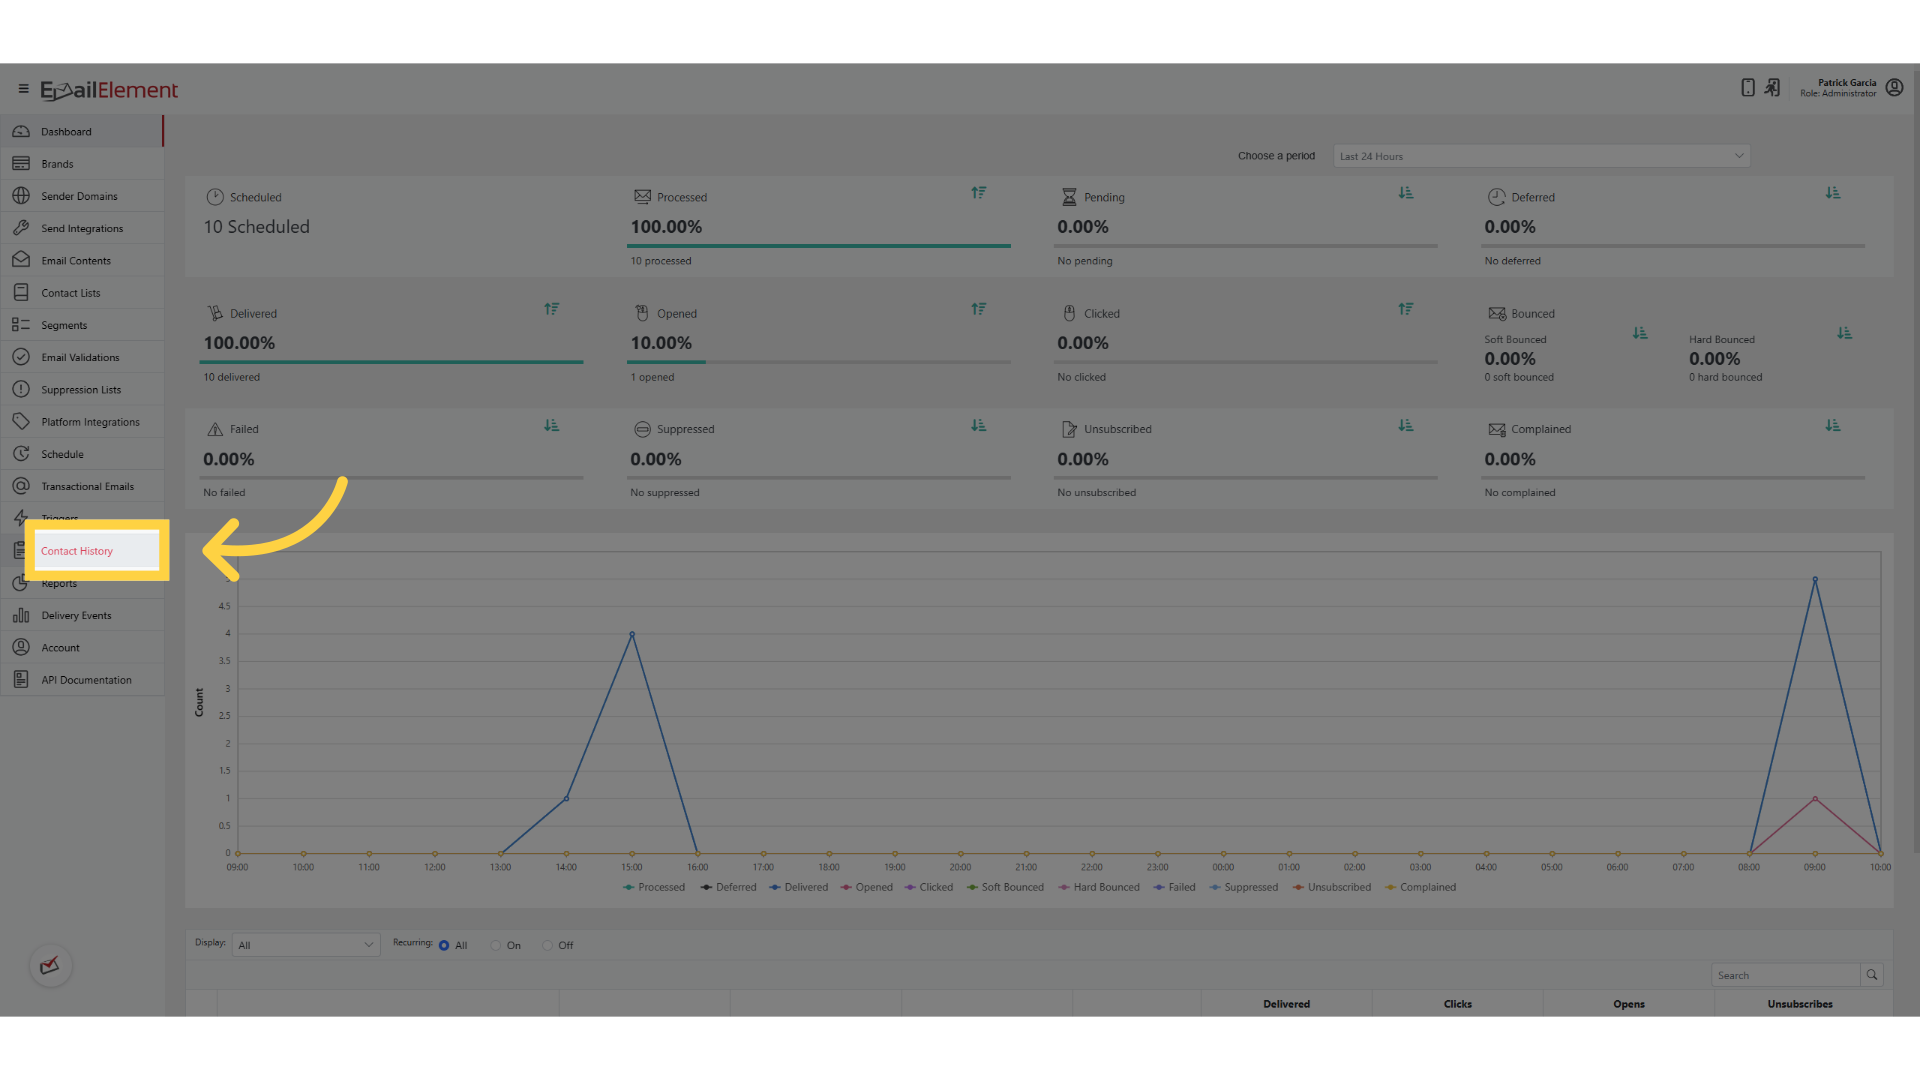
Navigate to Contact History from the sidebar
Click the Complainers tab (next to the Contact Search tab)
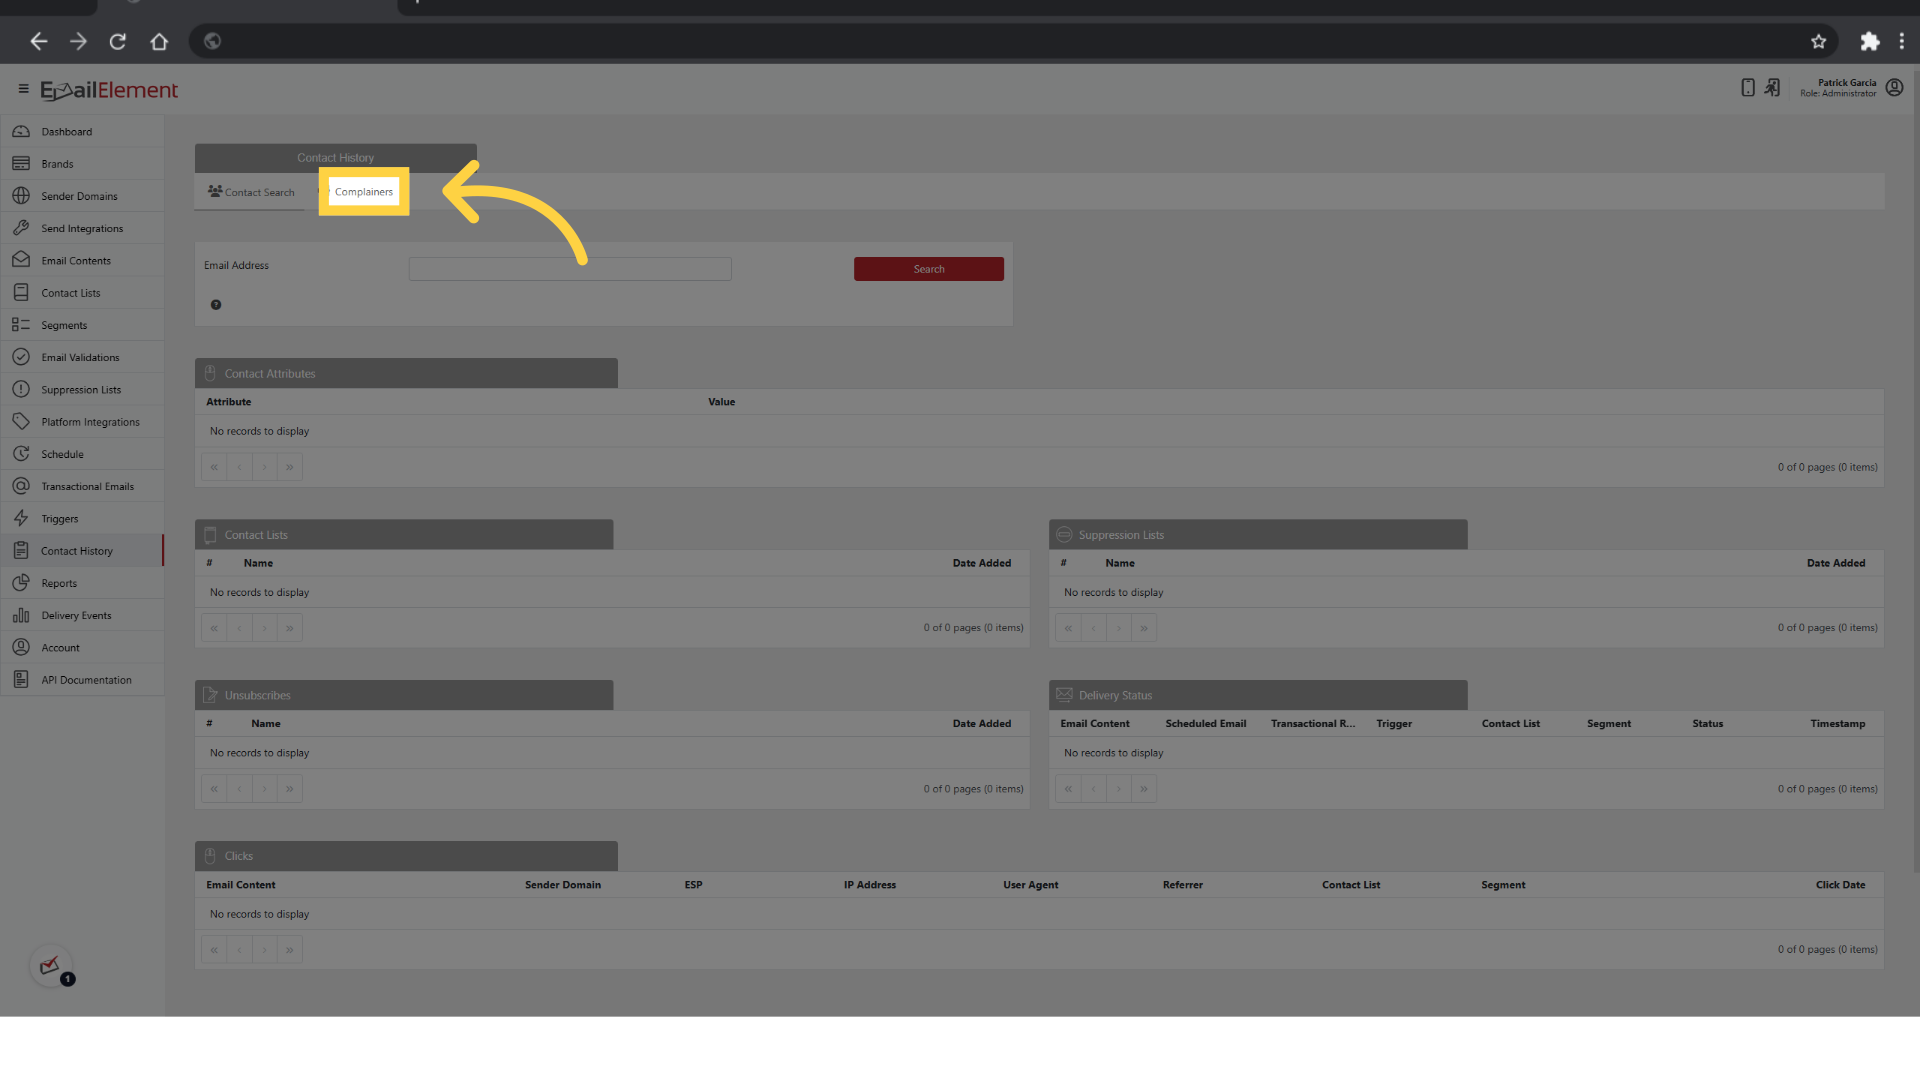
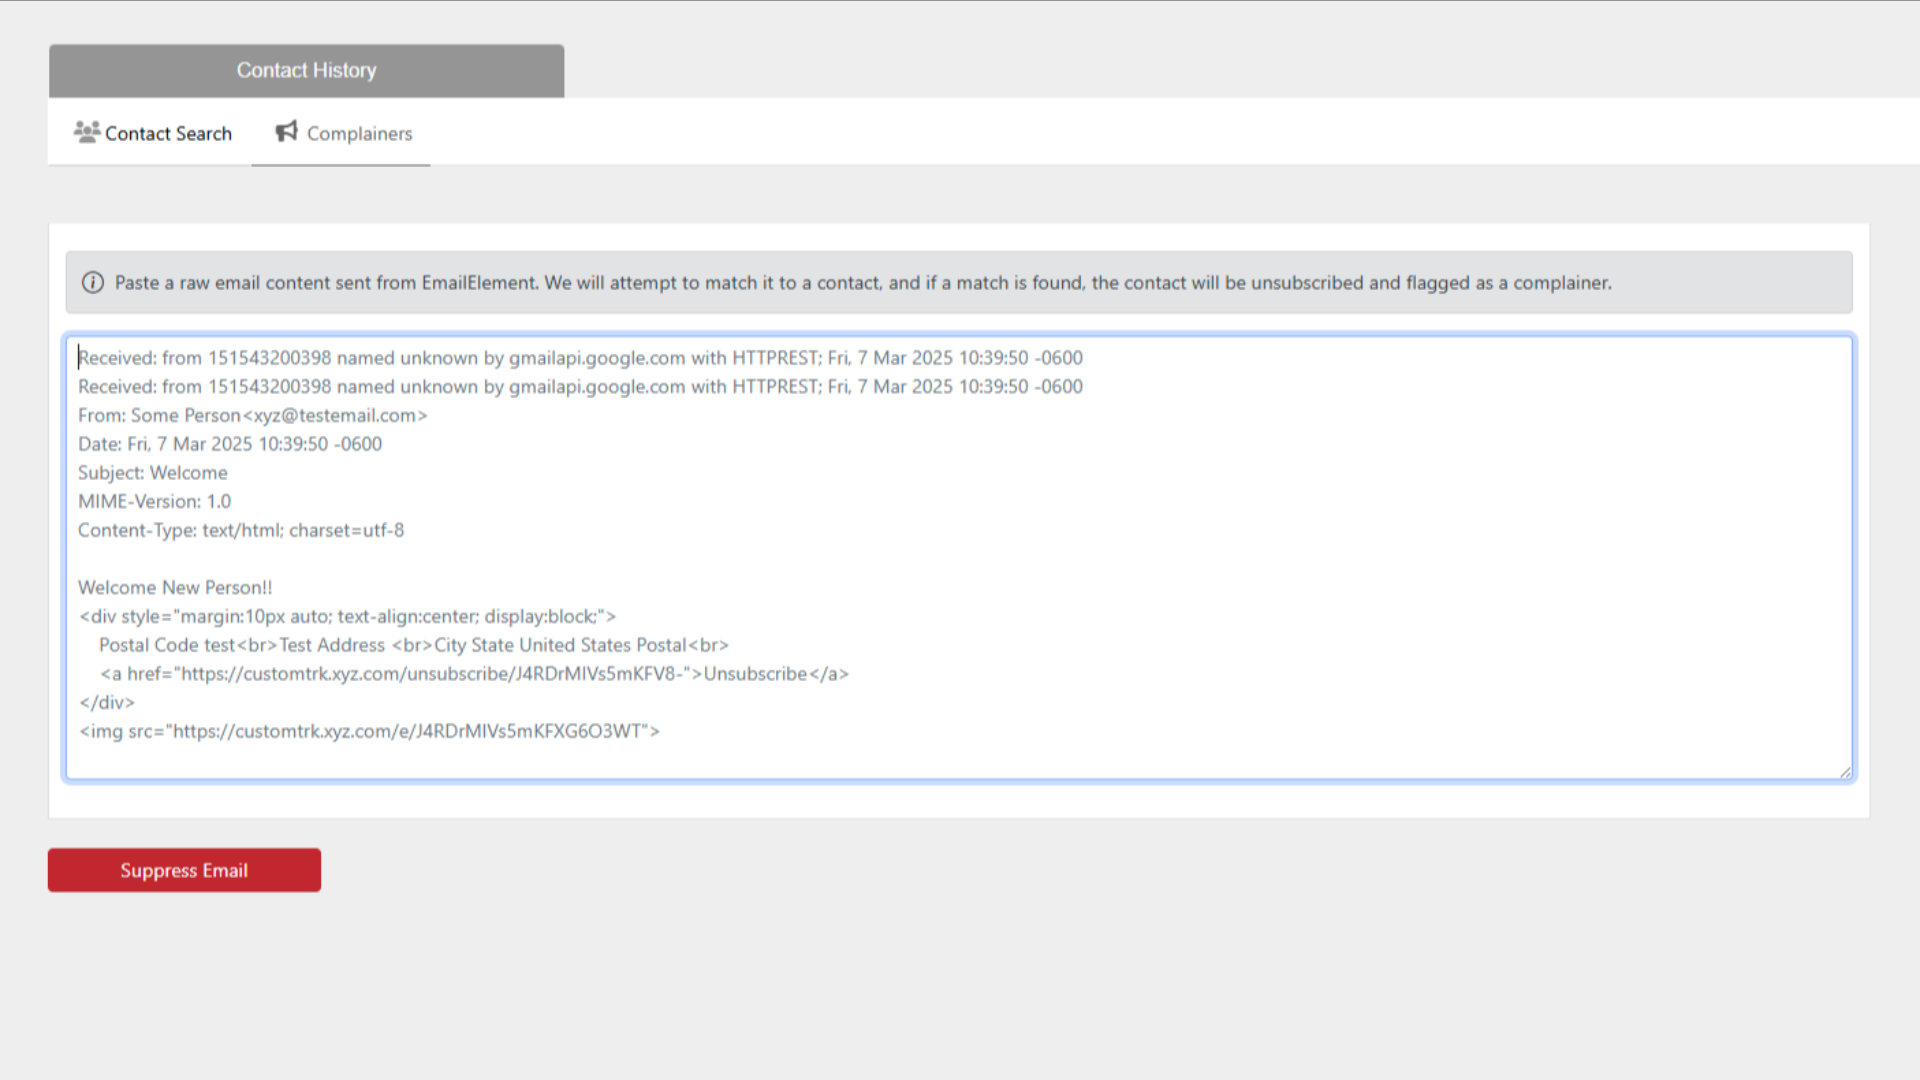
You will see a large text area for pasting raw email content
Step 2: Paste the Raw Email
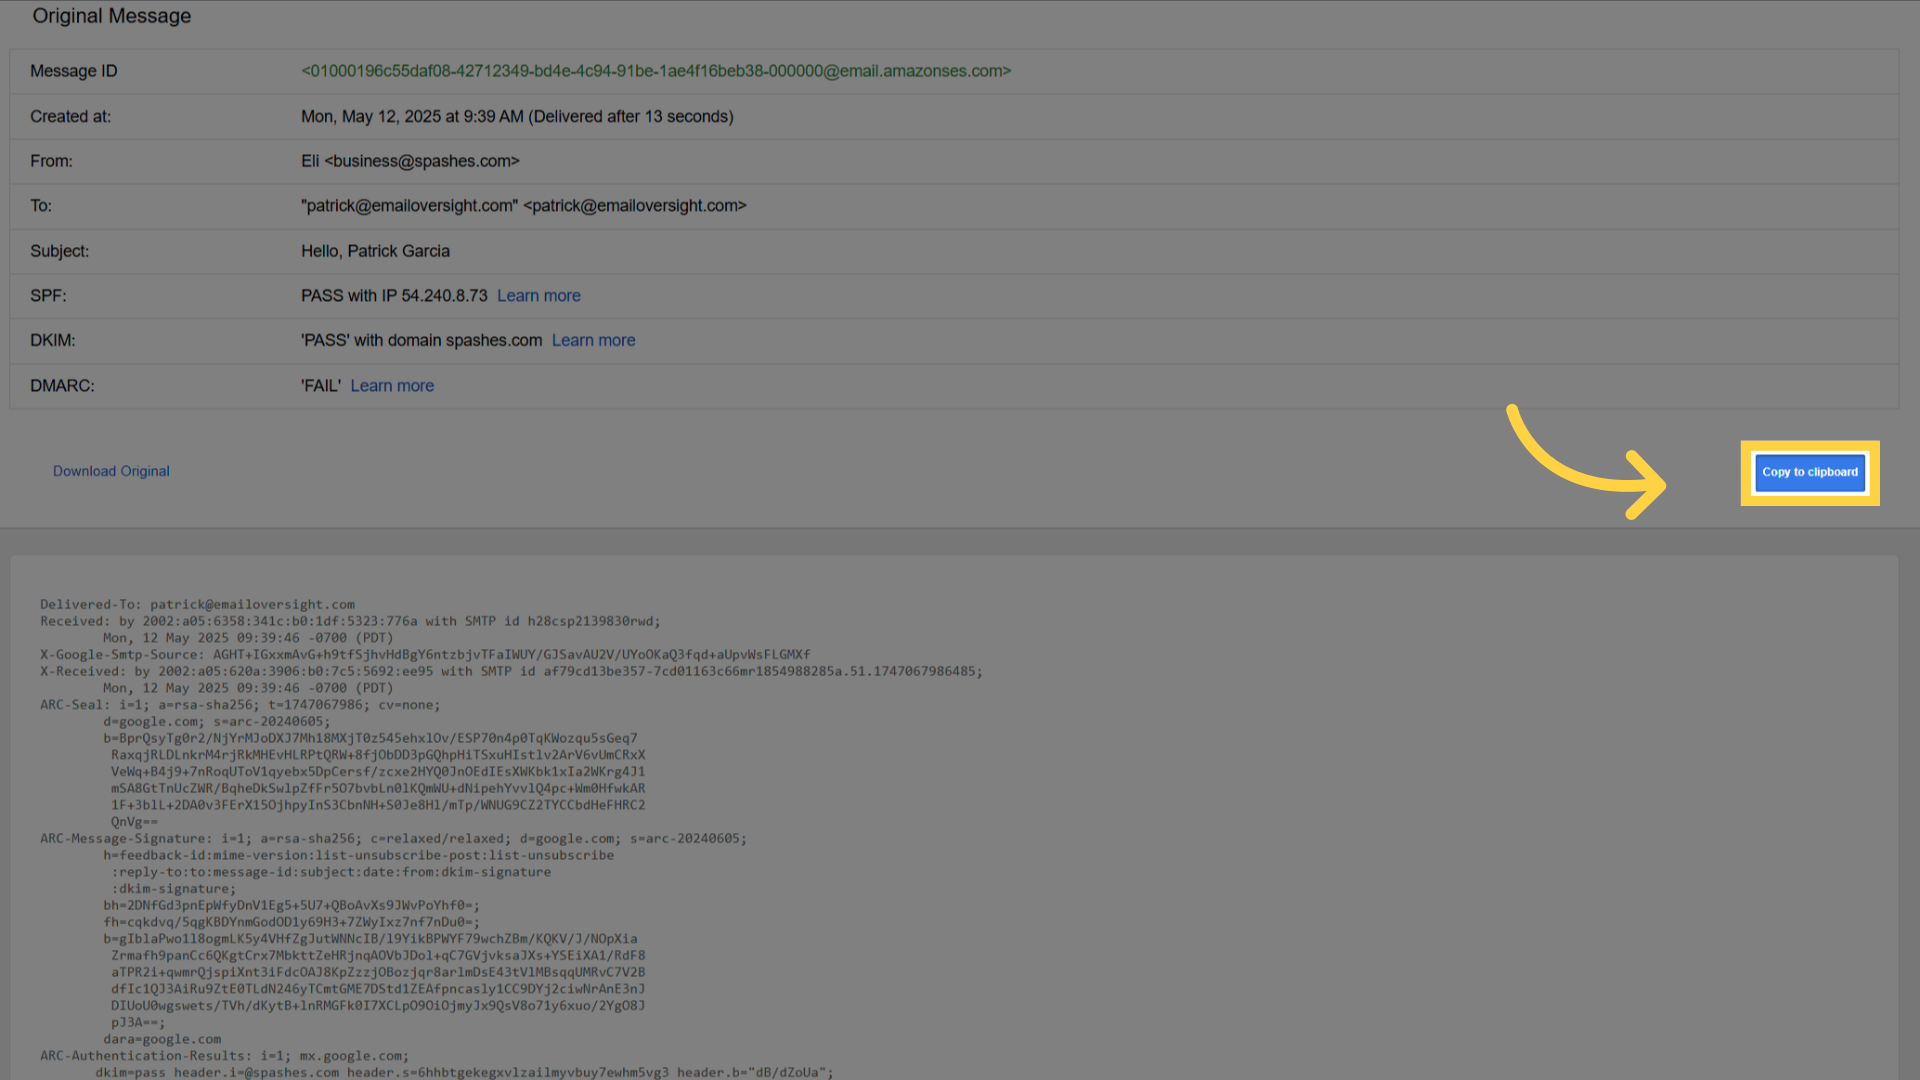
Copy the full raw email from the complaint source
- This must include the complete email headers (From, To, Subject, Message-ID, etc.)
- The email body should also be included
Paste the raw email content into the text area
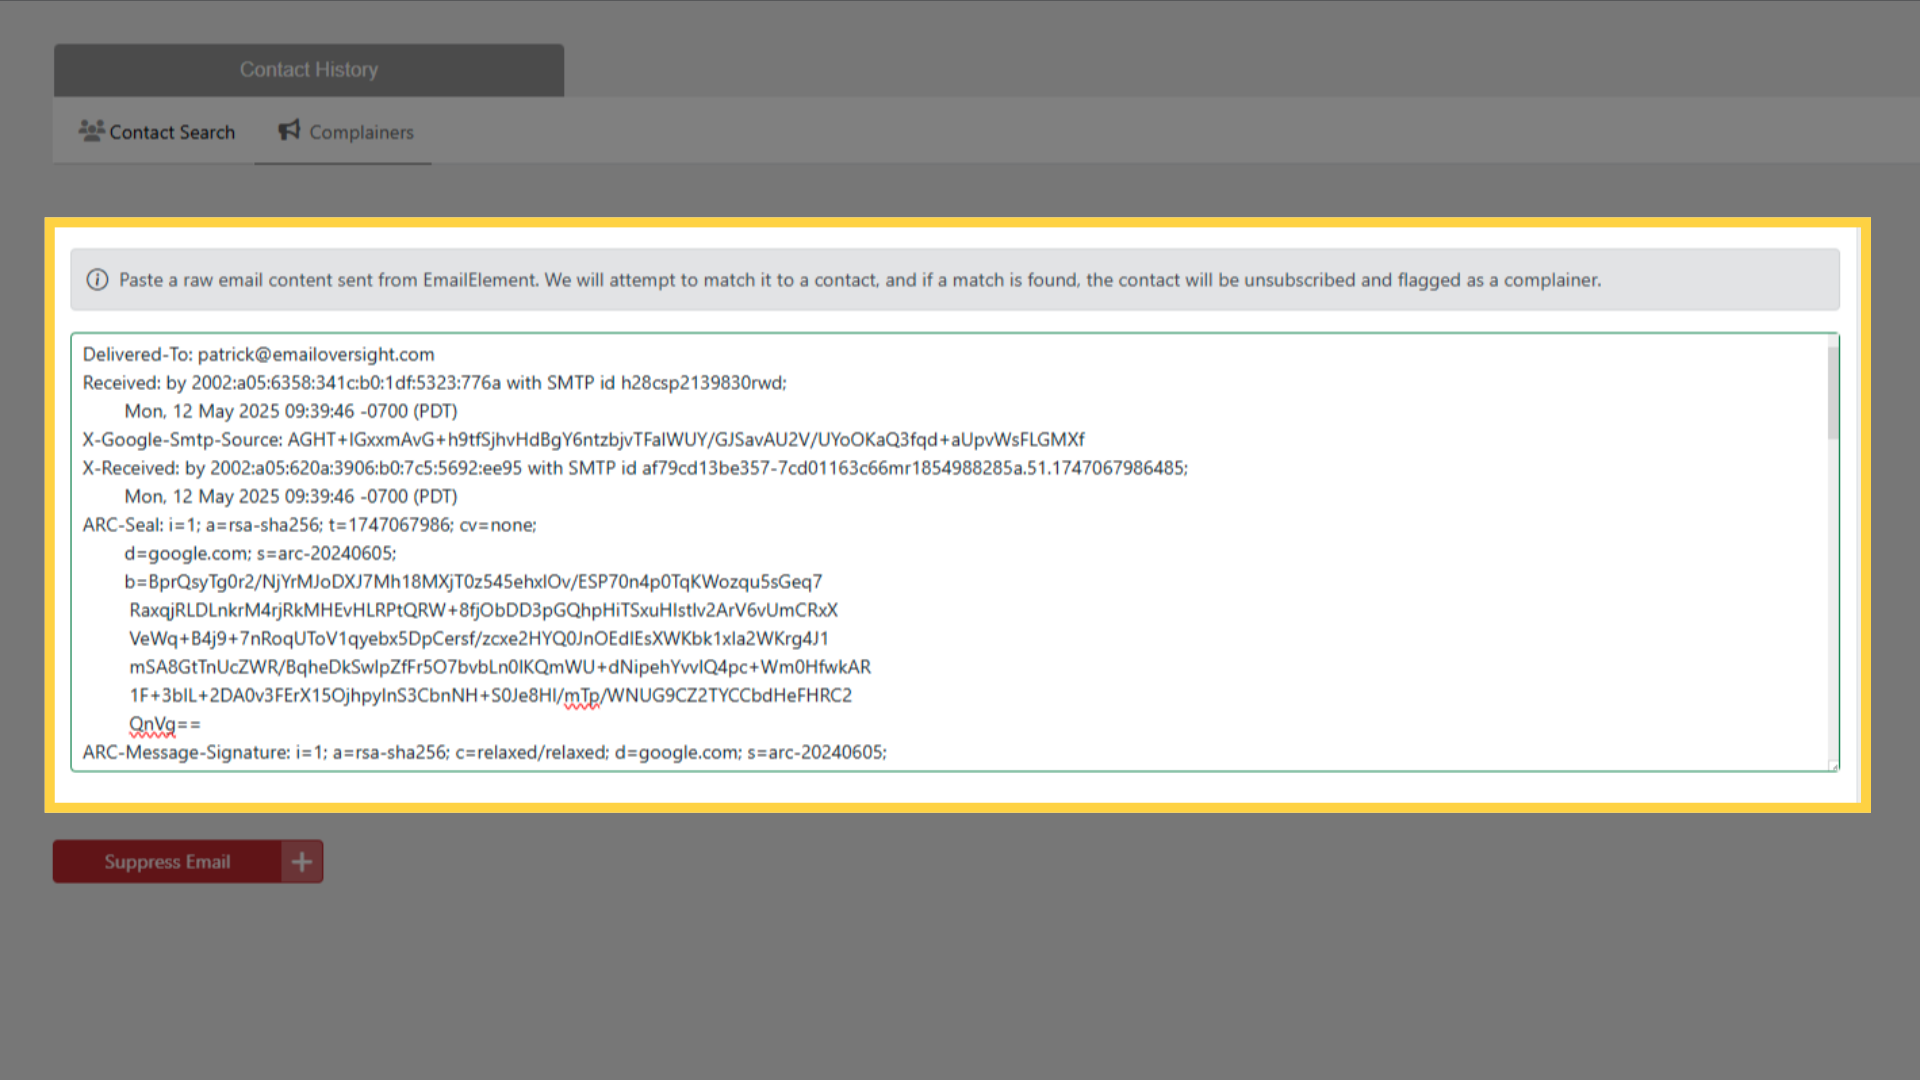
EmailElement parses the headers to identify the original recipient
Step 3: Suppress the Email
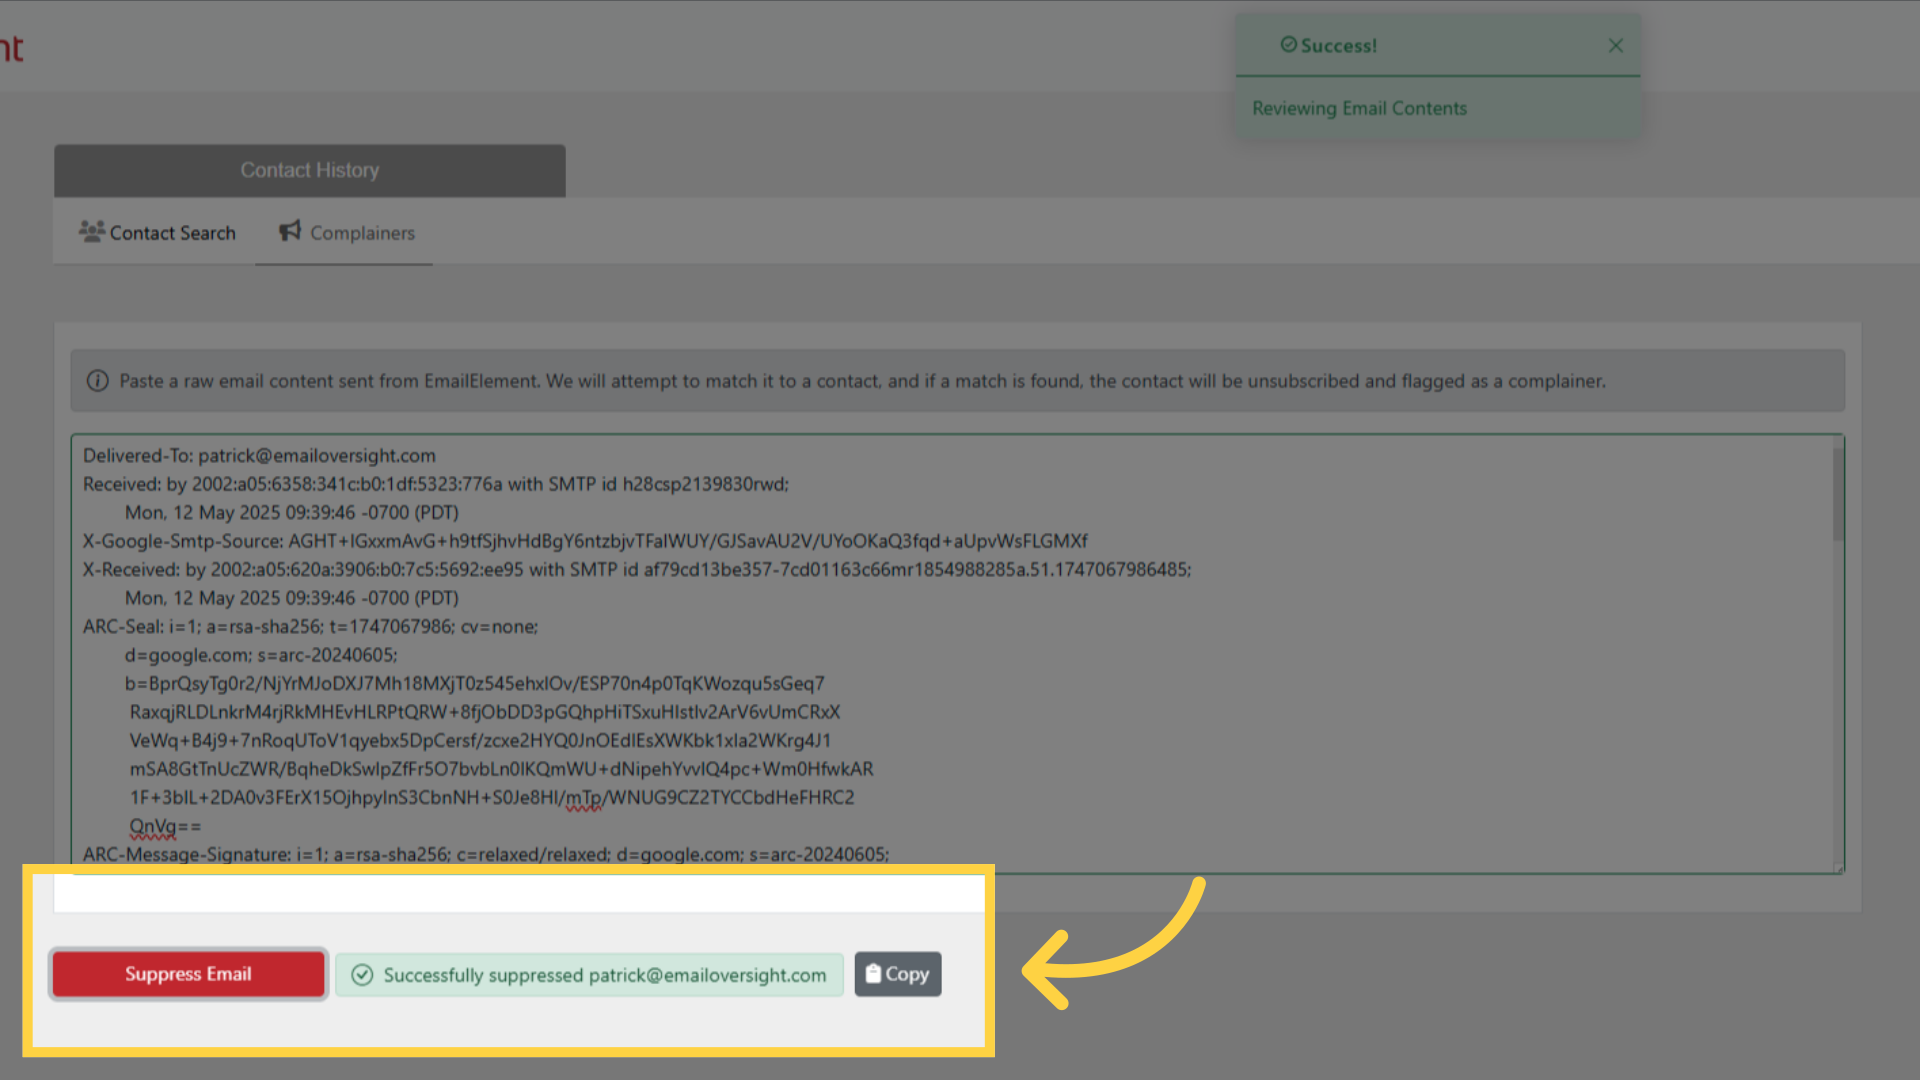
Click Suppress Email
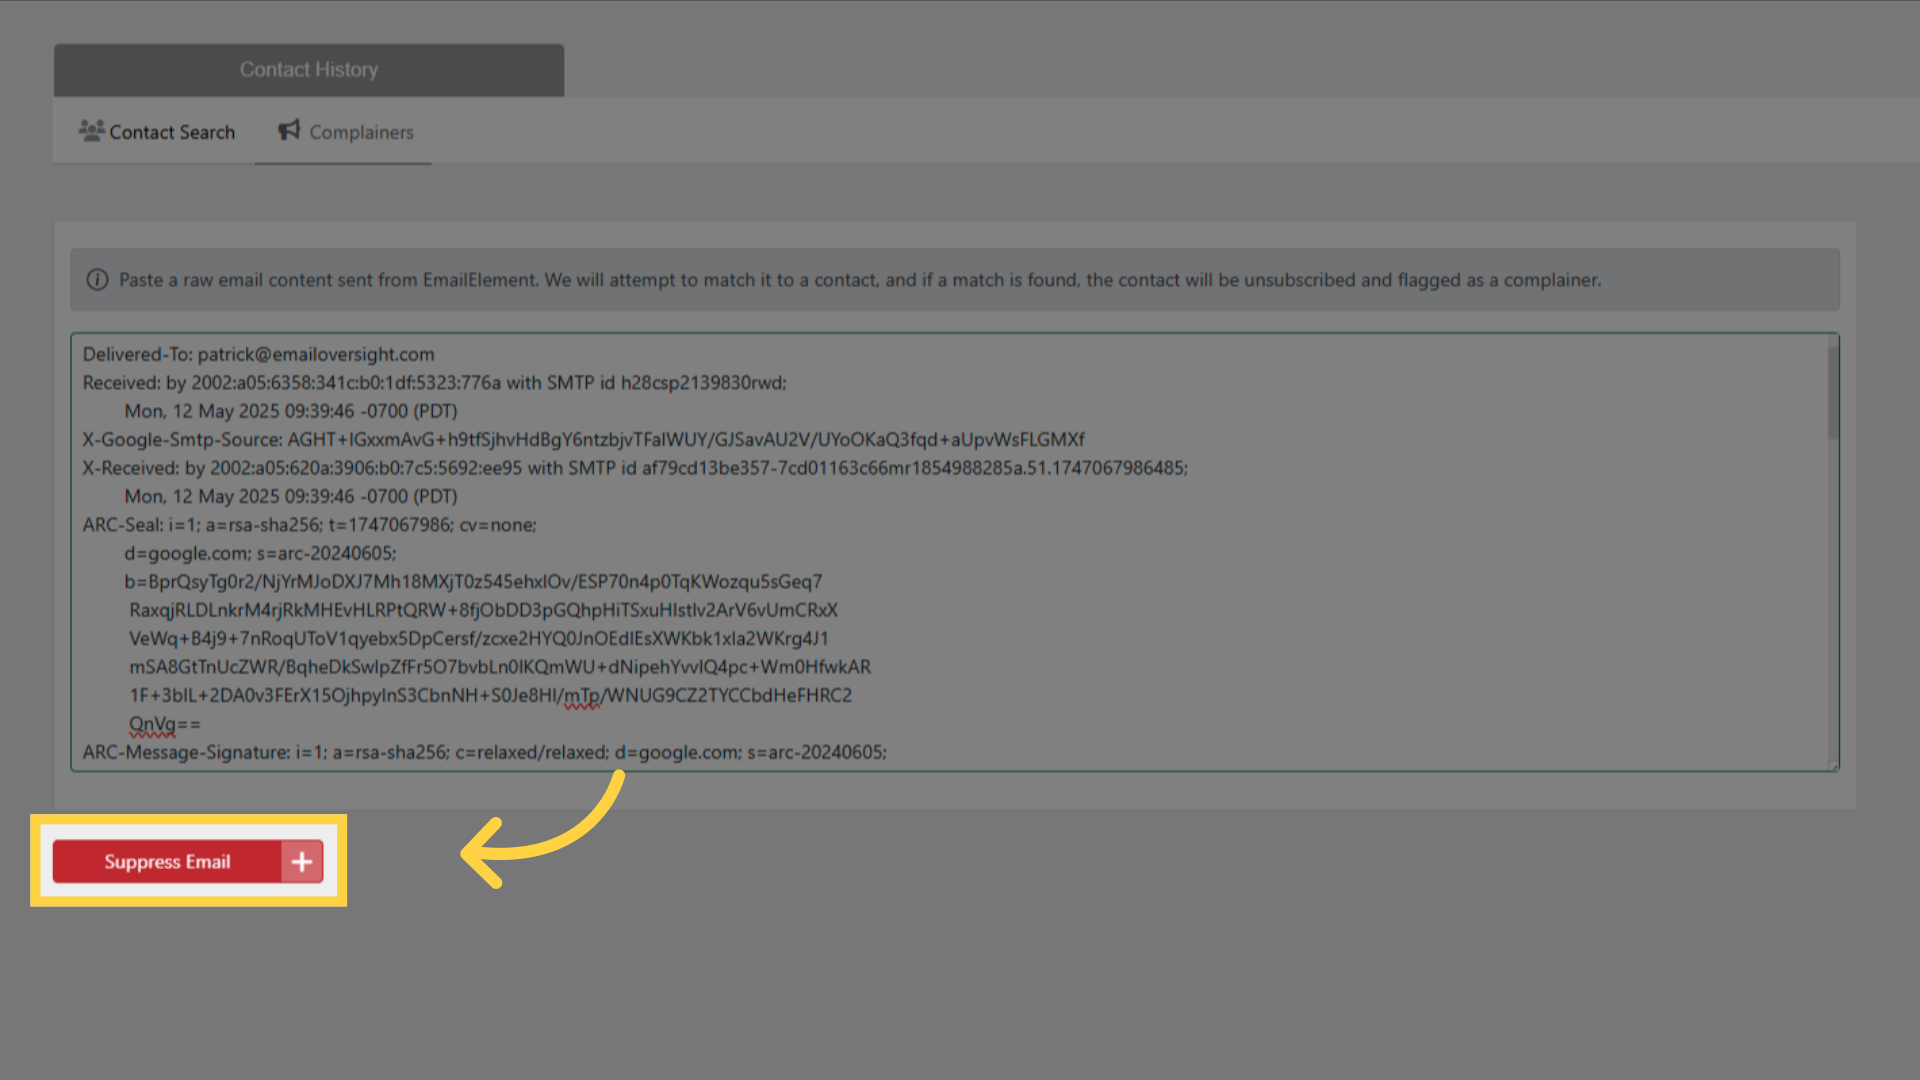
EmailElement processes the raw email:
- Extracts the recipient email address from the headers
- Searches for the contact across all Contact Lists
- If found, adds the contact as a complainer to the appropriate Suppression List
A confirmation message shows the suppressed email address
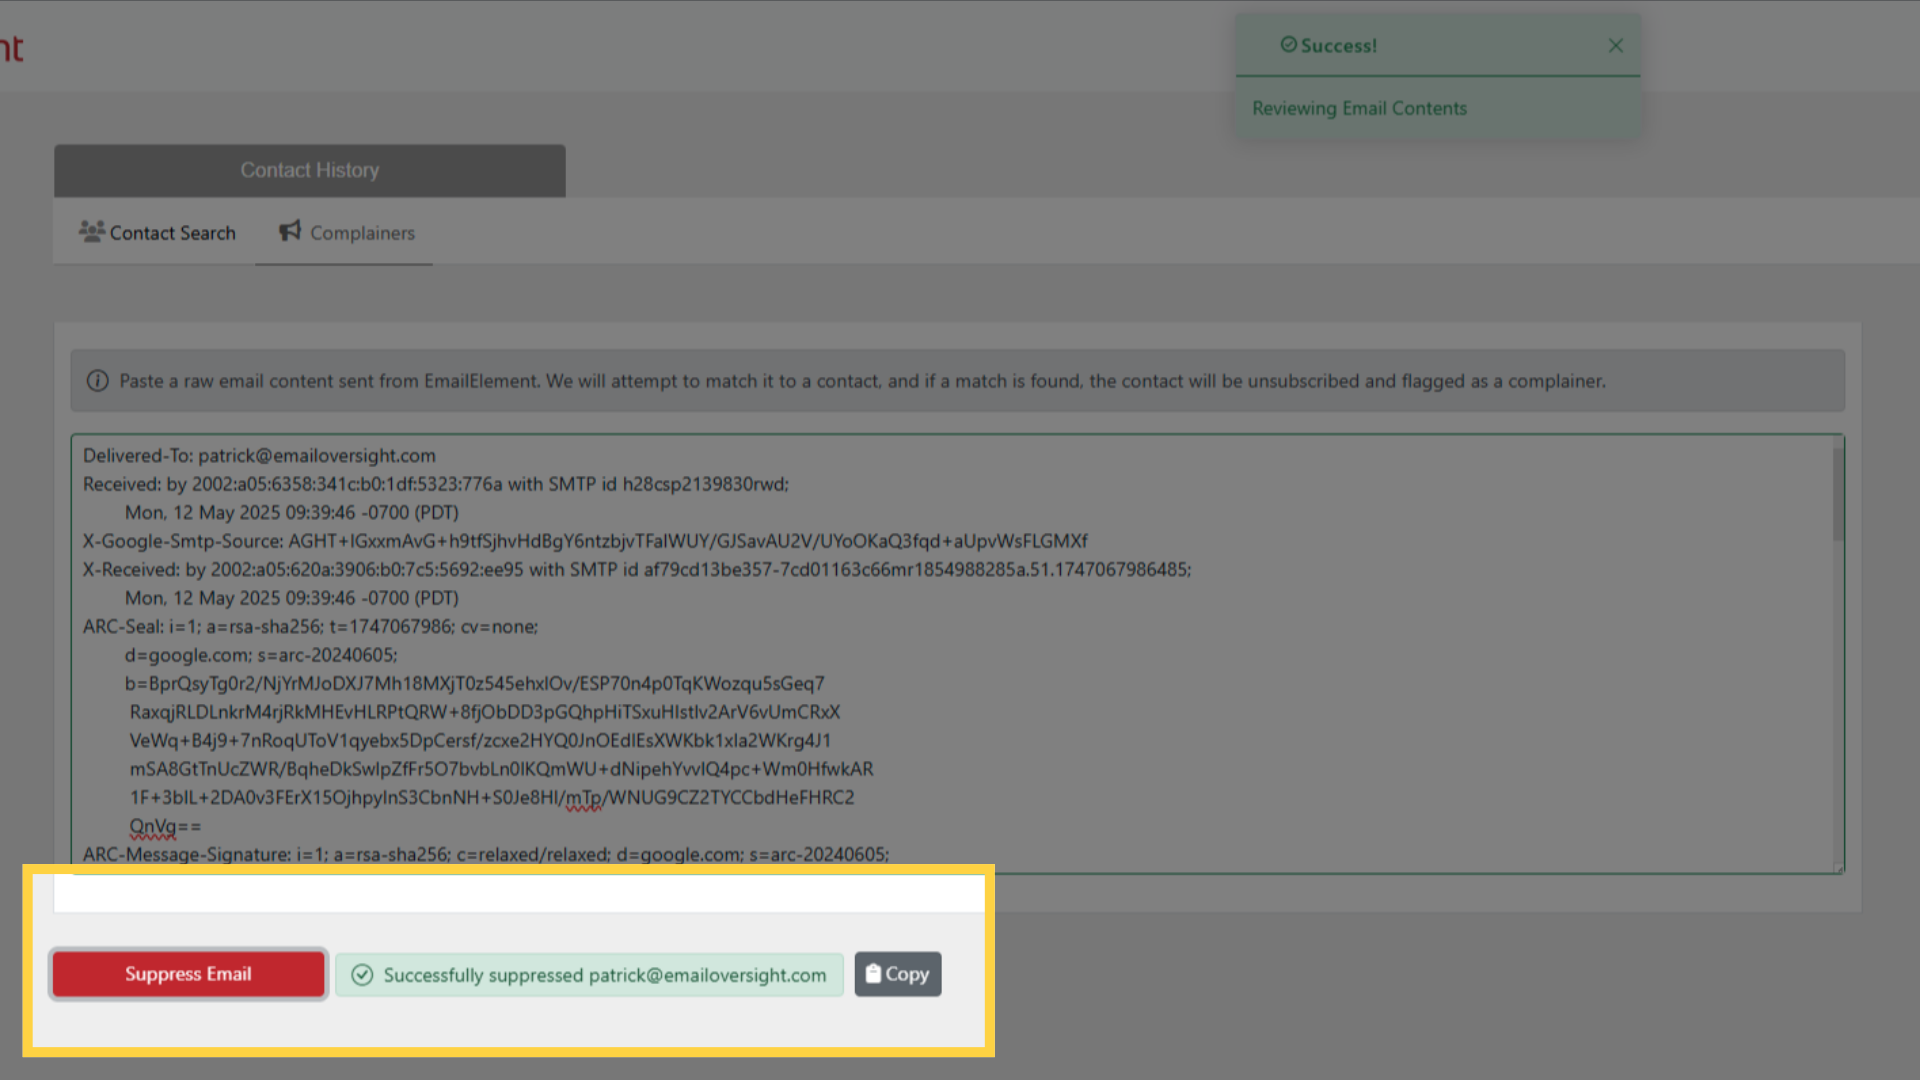
If the contact cannot be identified from the raw email, an error message is displayed
Step 4: Copy and Verify
Click Copy to copy the suppressed email address to your clipboard
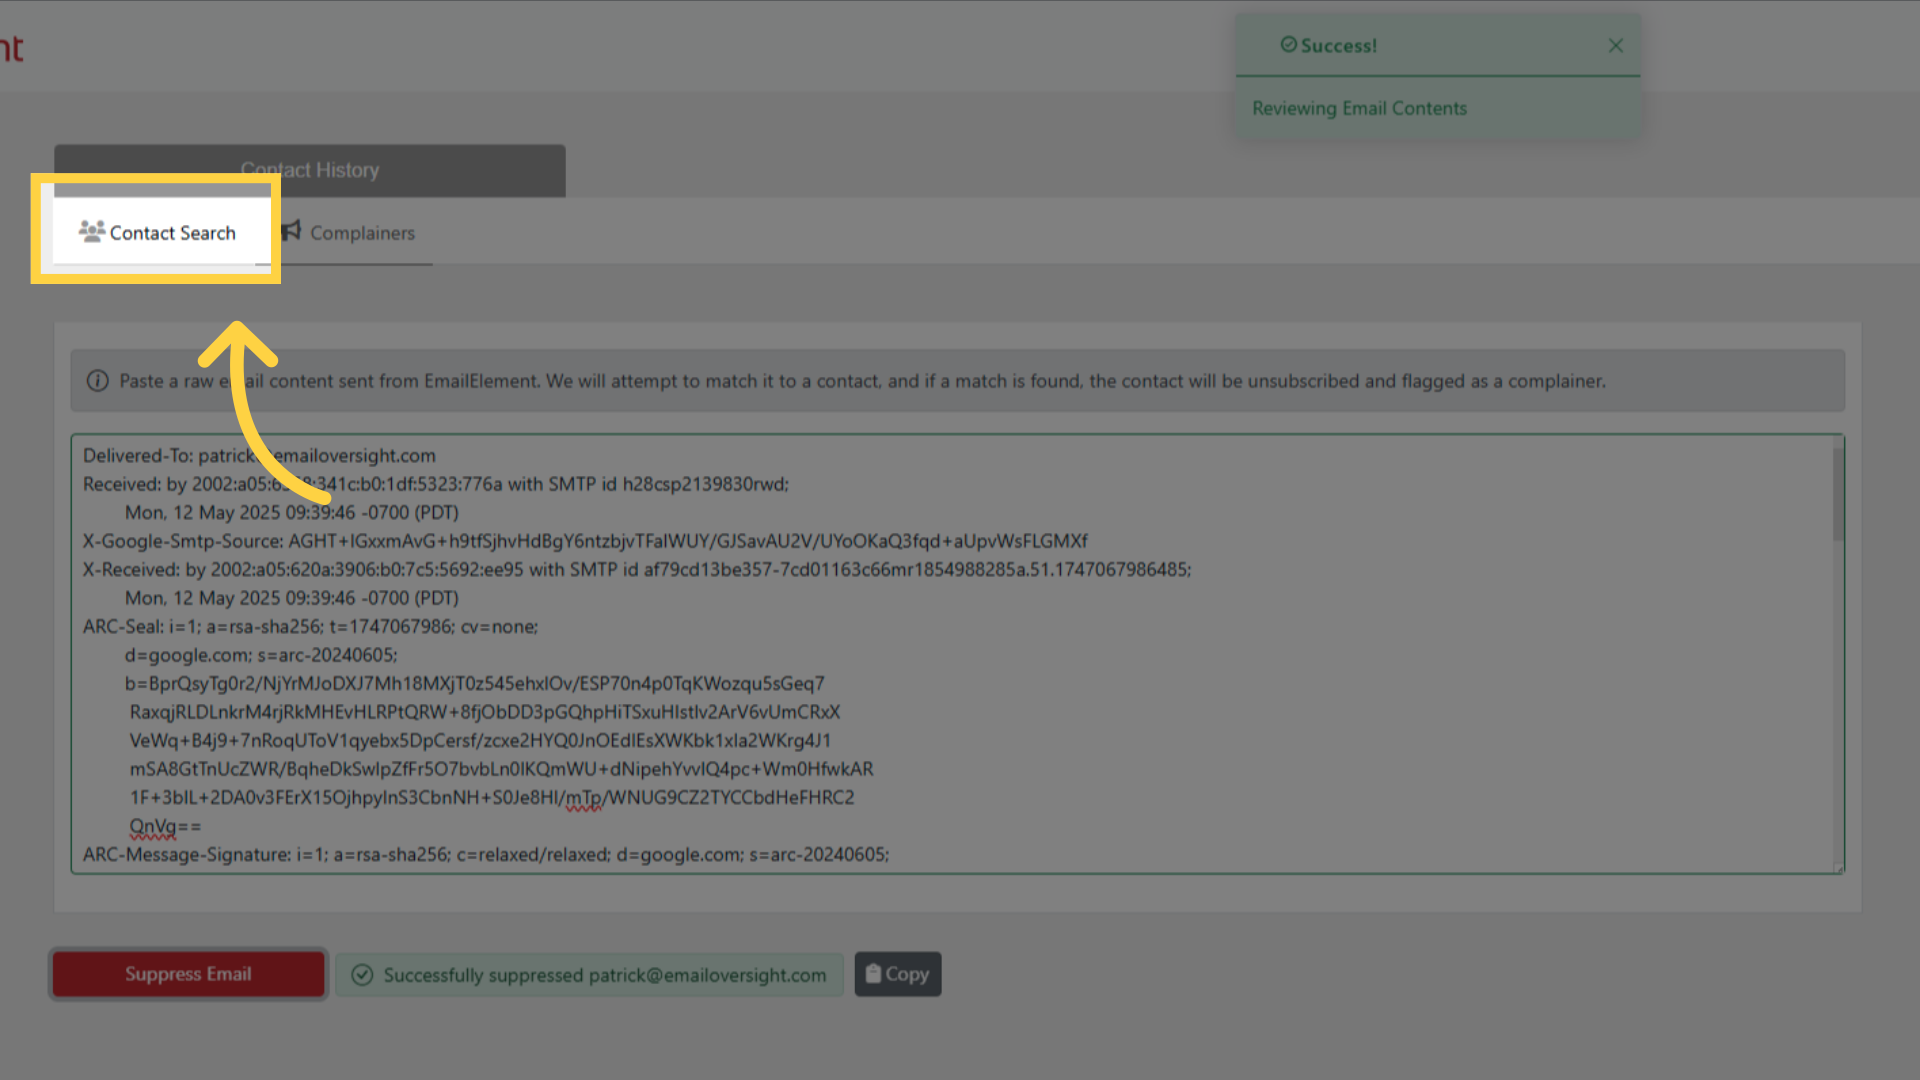
Switch to the Contact Search tab
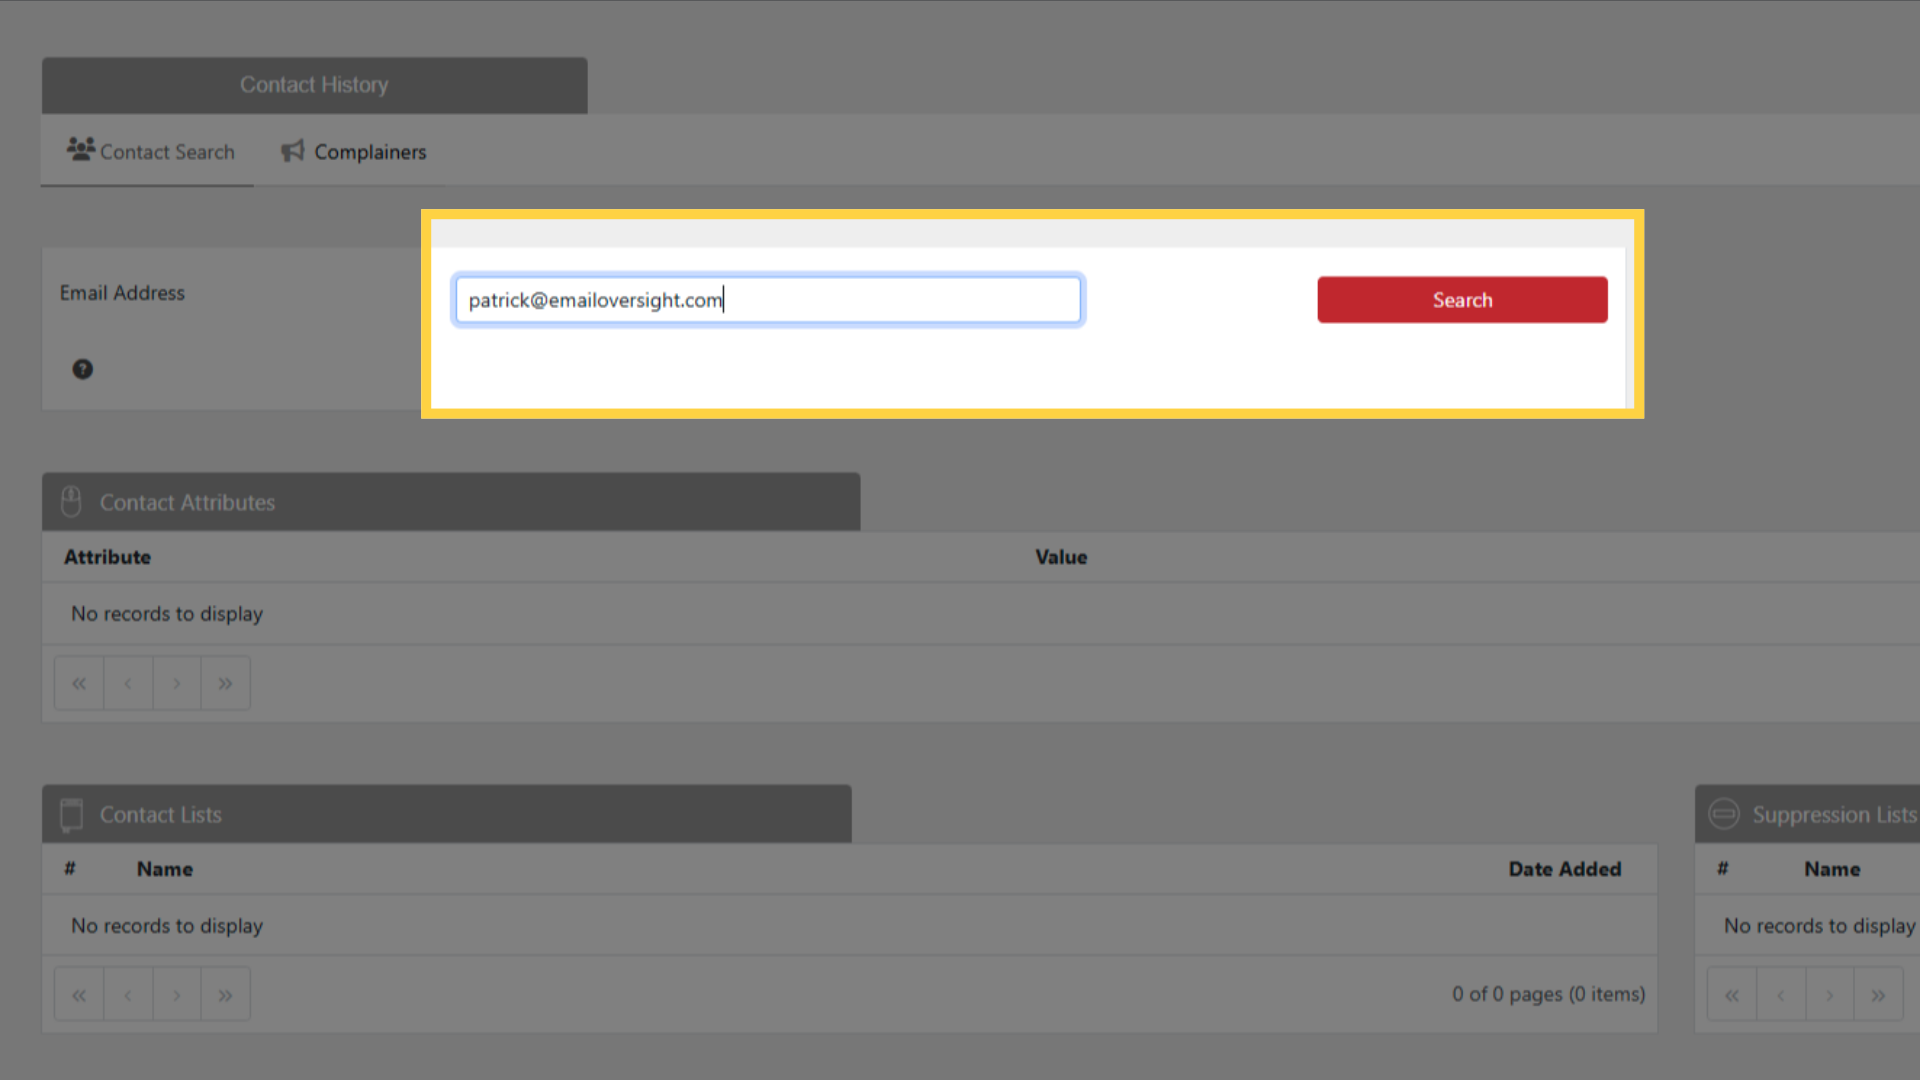
Paste the email address into the search field
Click Search
Verify the contact's profile shows:
The Suppression Lists section includes the list they were added to
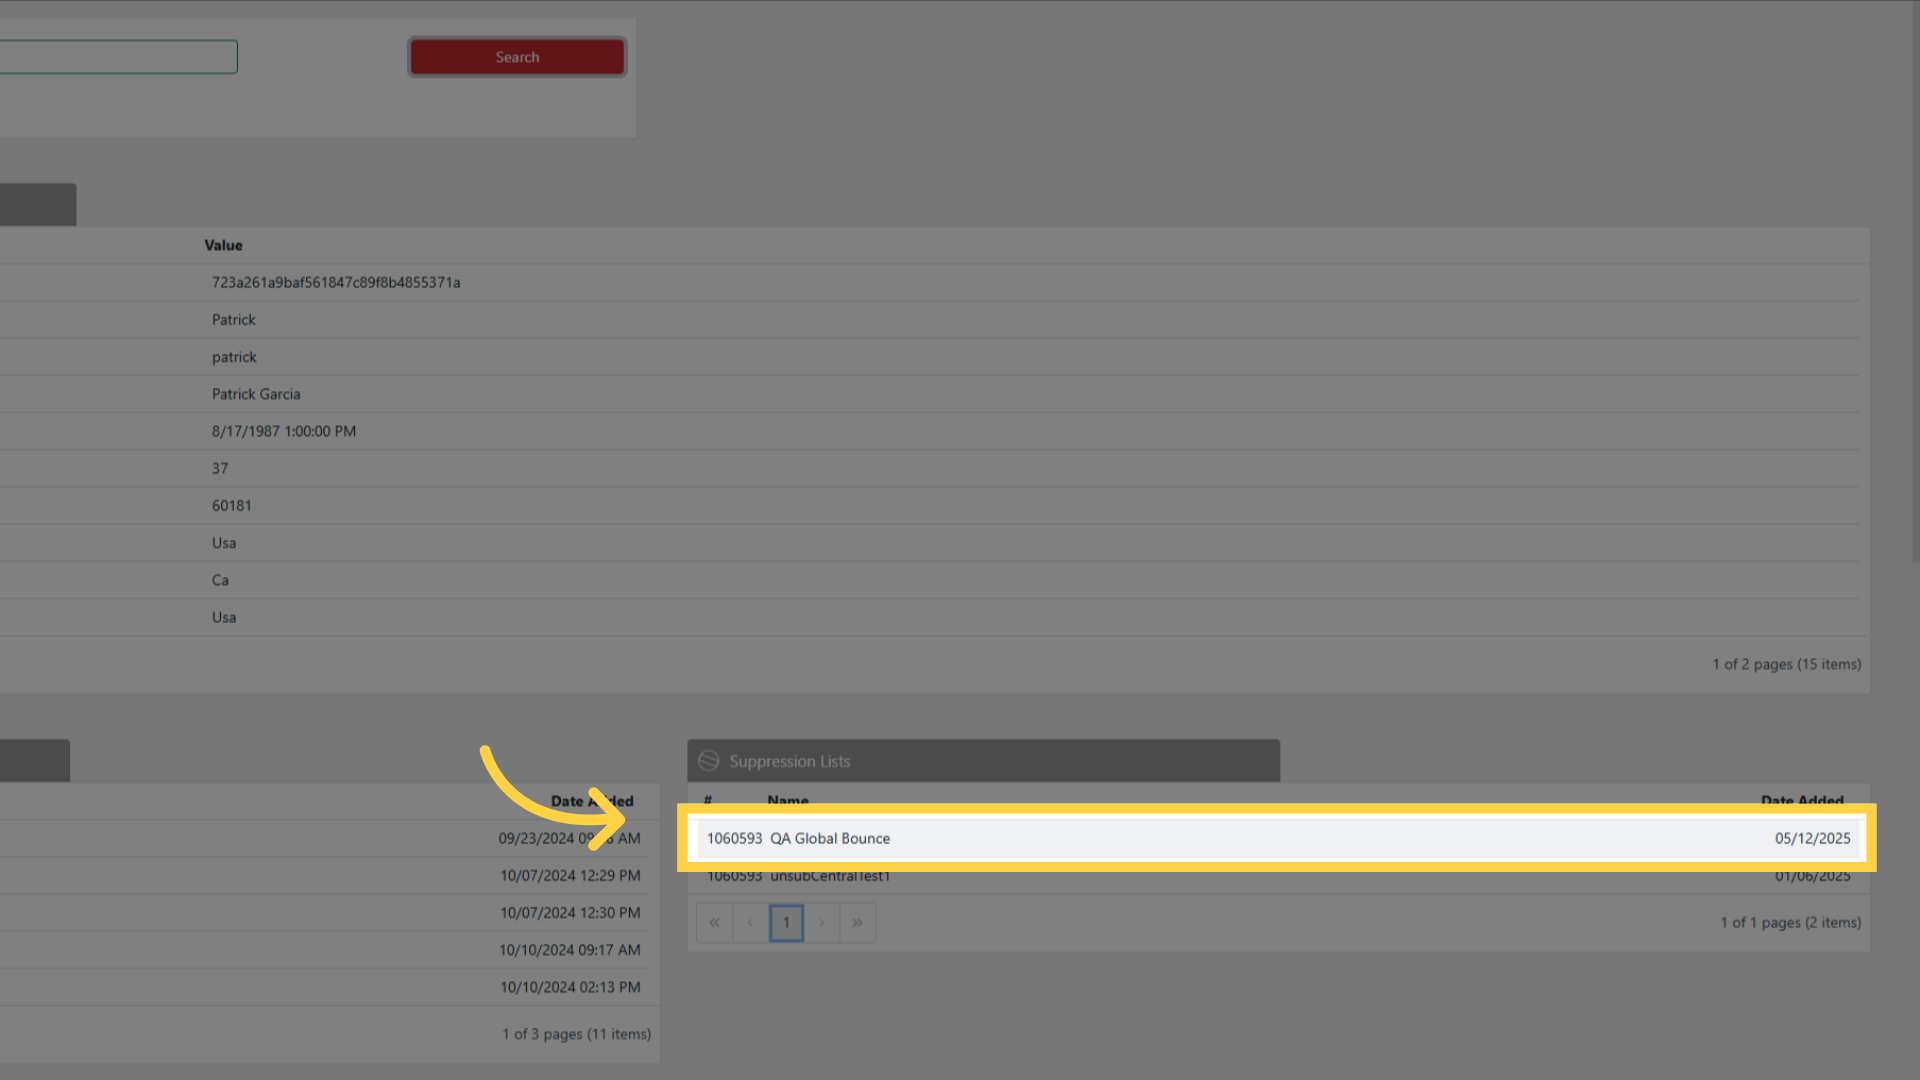
The suppression reason indicates "Complainer" or "Spam Complaint"
Step 5: View Complaint Data
Dashboard
Navigate to the Dashboard
Complaint counts are shown in campaign summary cards
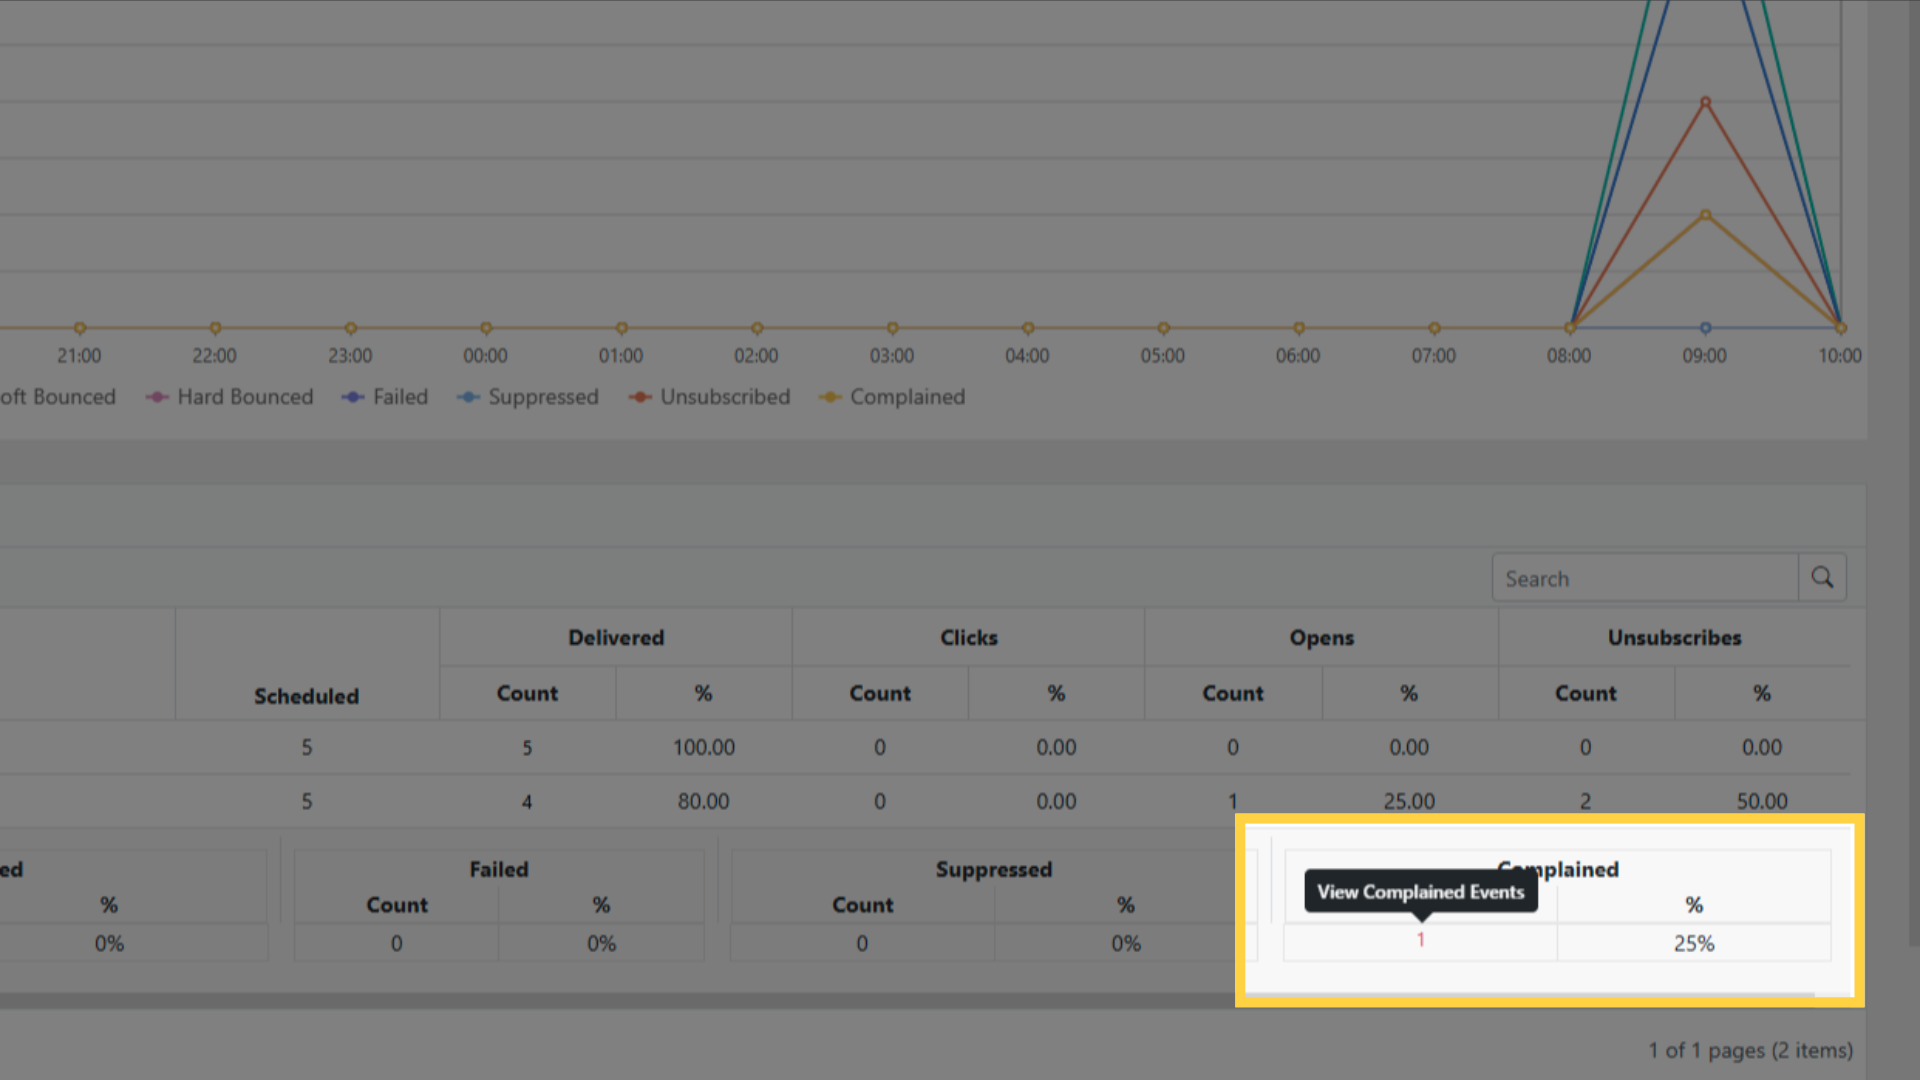
Click the complaint count to jump to the corresponding Delivery Event
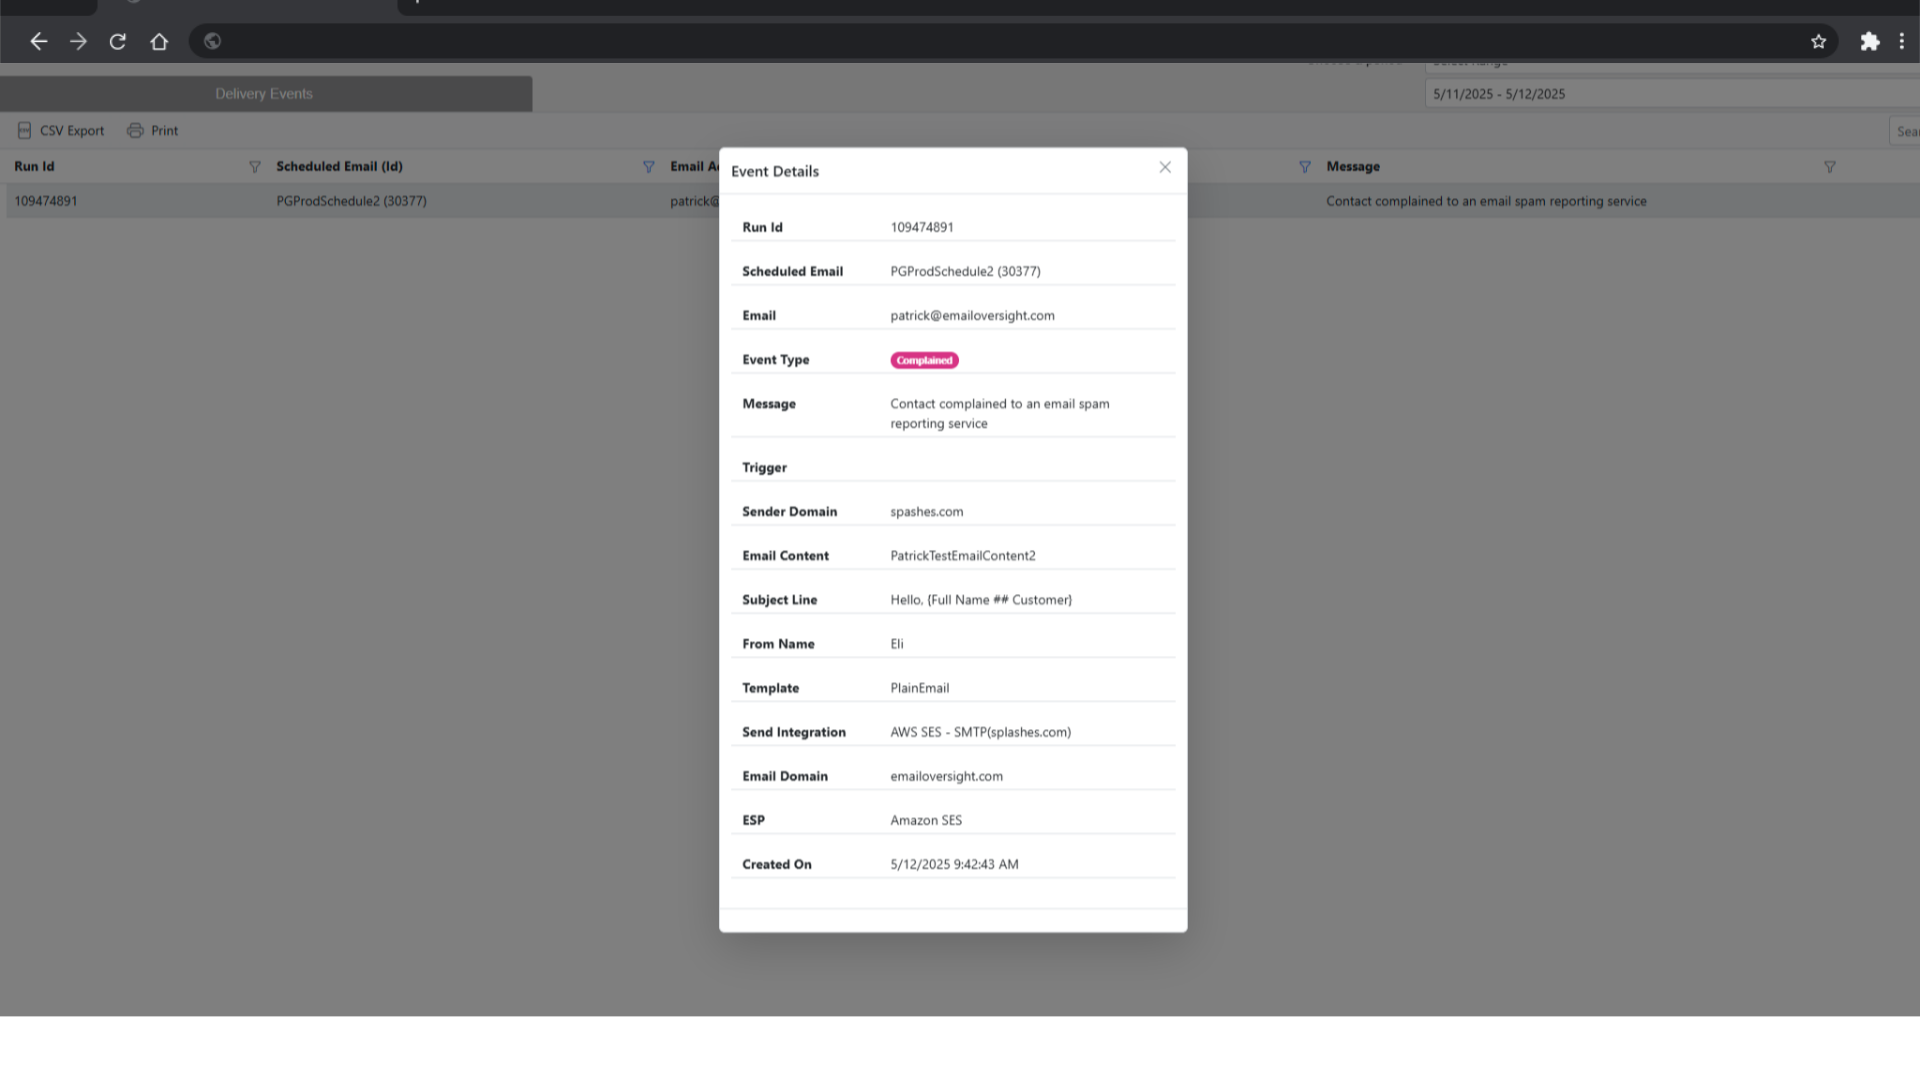
The Delivery Event shows the full details of the original send
Reports
Navigate to Reports
Complaint rates are included in campaign performance metrics
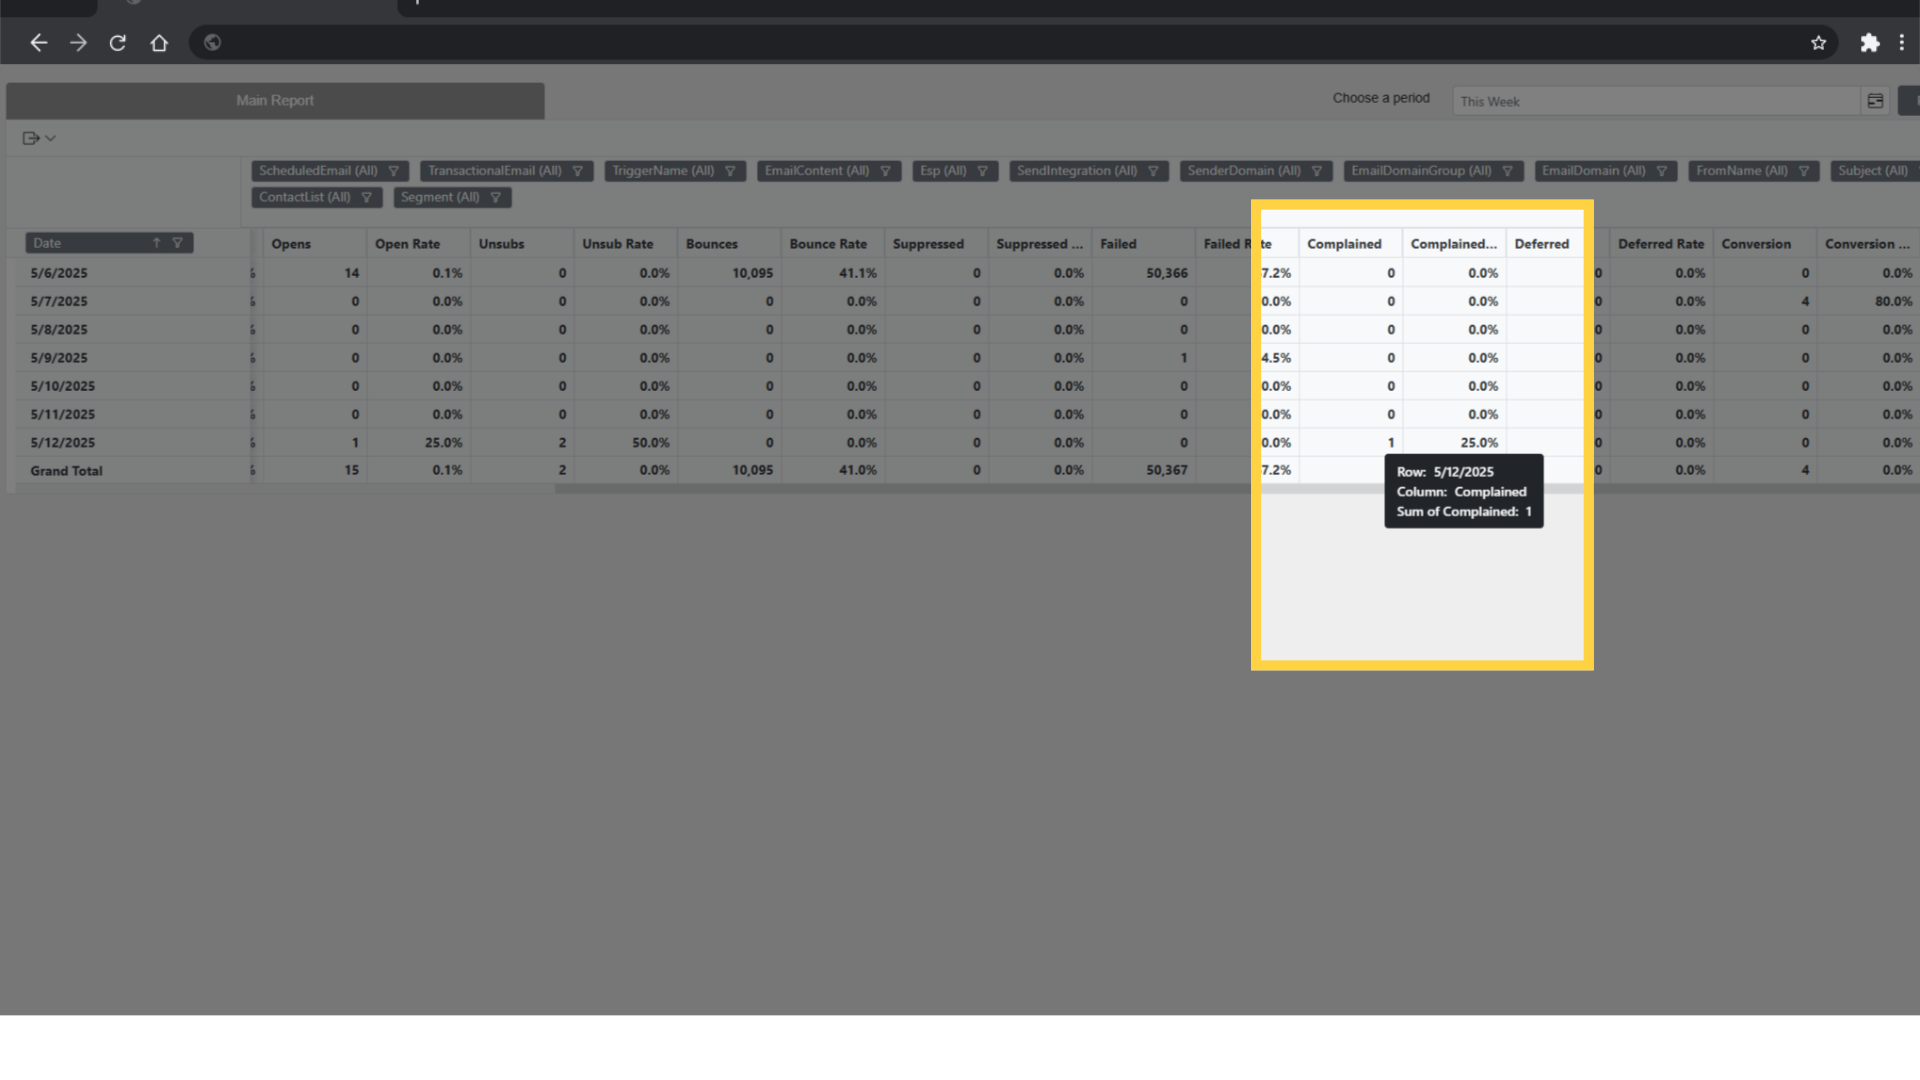
Monitor complaint rates over time to identify content or targeting issues
High complaint rates (above 0.1%) require immediate attention
Best Practices
- Process complaints promptly — delayed suppression leads to repeated sends and more complaints
- Always verify the suppression was applied by searching in the Contact Search tab
- If you receive complaints from a specific domain or ISP, review your content and targeting for that audience
- Set up Webhooks with the Complained event type to automate complaint processing in your own systems
- Use Bounce Rules to auto-suppress patterns if you see repeated complaint sources