

Mailgun
To setup Mailgun for integration with EmailElement:
- Have at least one domain added to your Mailgun account
- An API key with the correct role
Add a Sending Domain
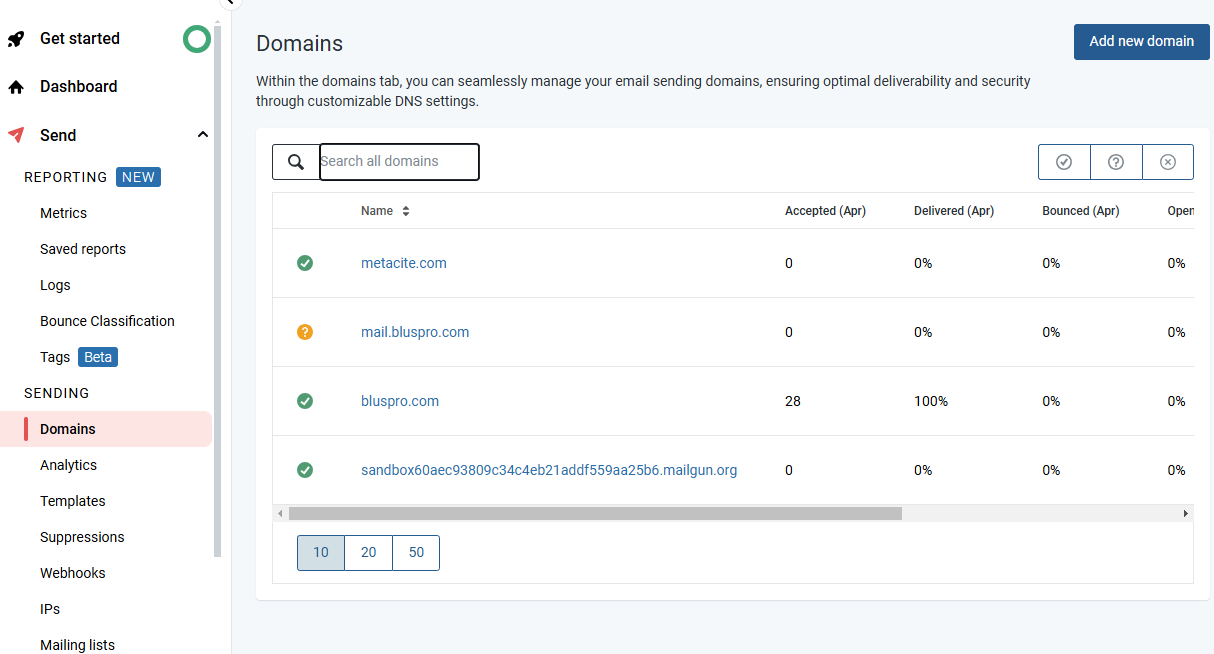
- From the navigation panel, go to Sending > Domains
- Click the “Add new domain” button
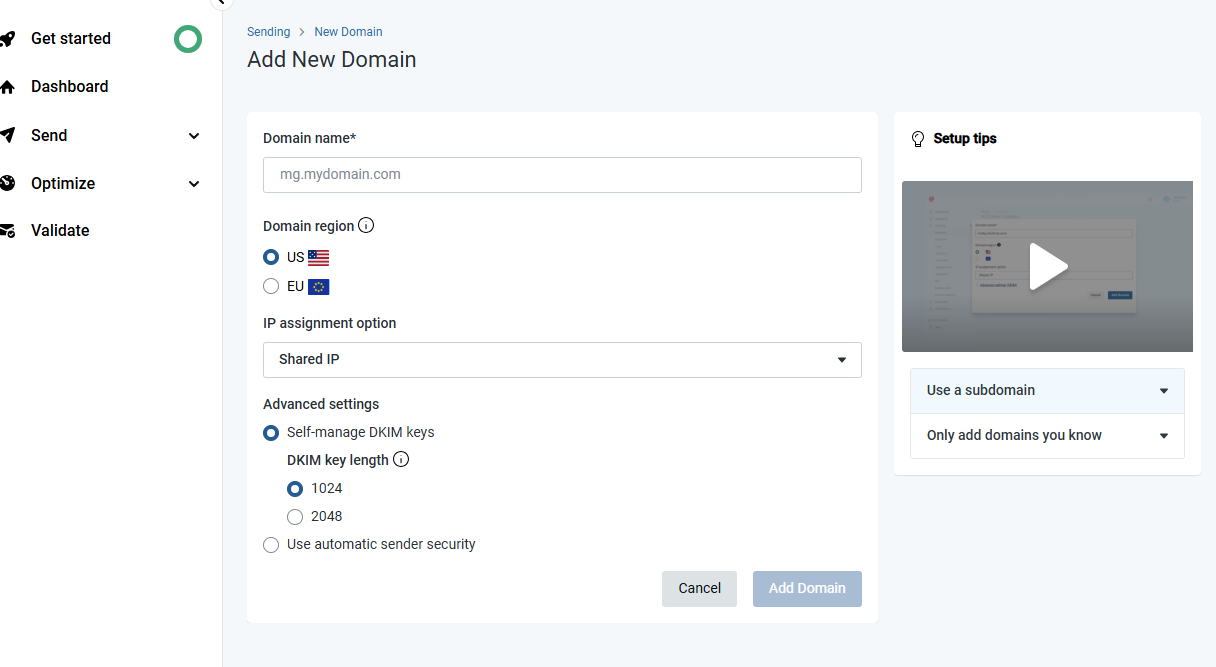
- Enter your domain details and click “Add domain”
Add DNS Records
- After adding your Domain it will now be listed in the Sending > Domains section. Select it from here.
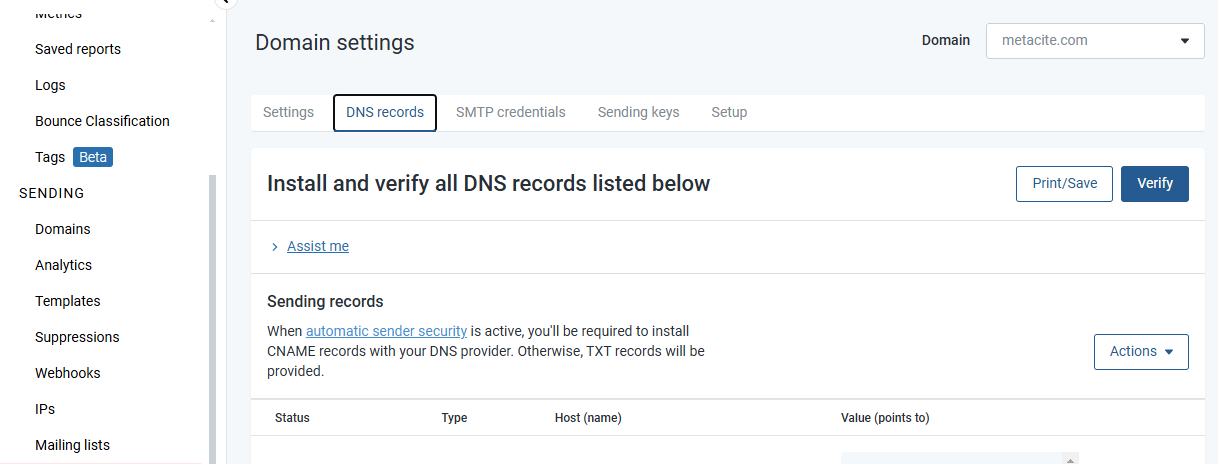
- Click on the “DNS records” tab where you'll see records for Sending, Receiving, and Tracking
- Add all of the DNS records for the domain in your DNS Management System
- Hit the “Verify” button when you're ready to check that everything is set up properly
Create an API Key
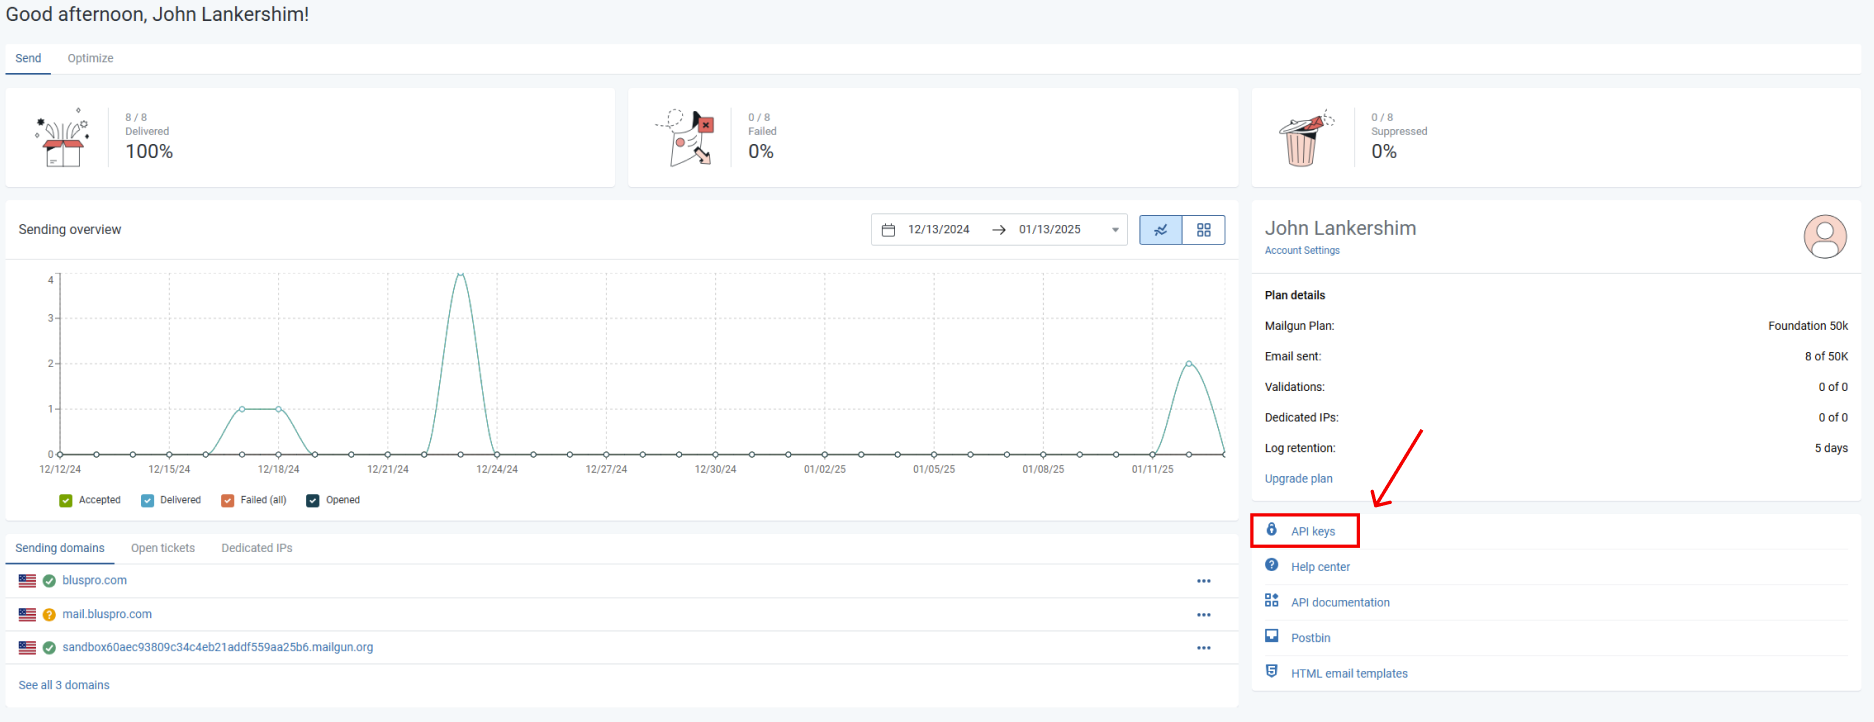
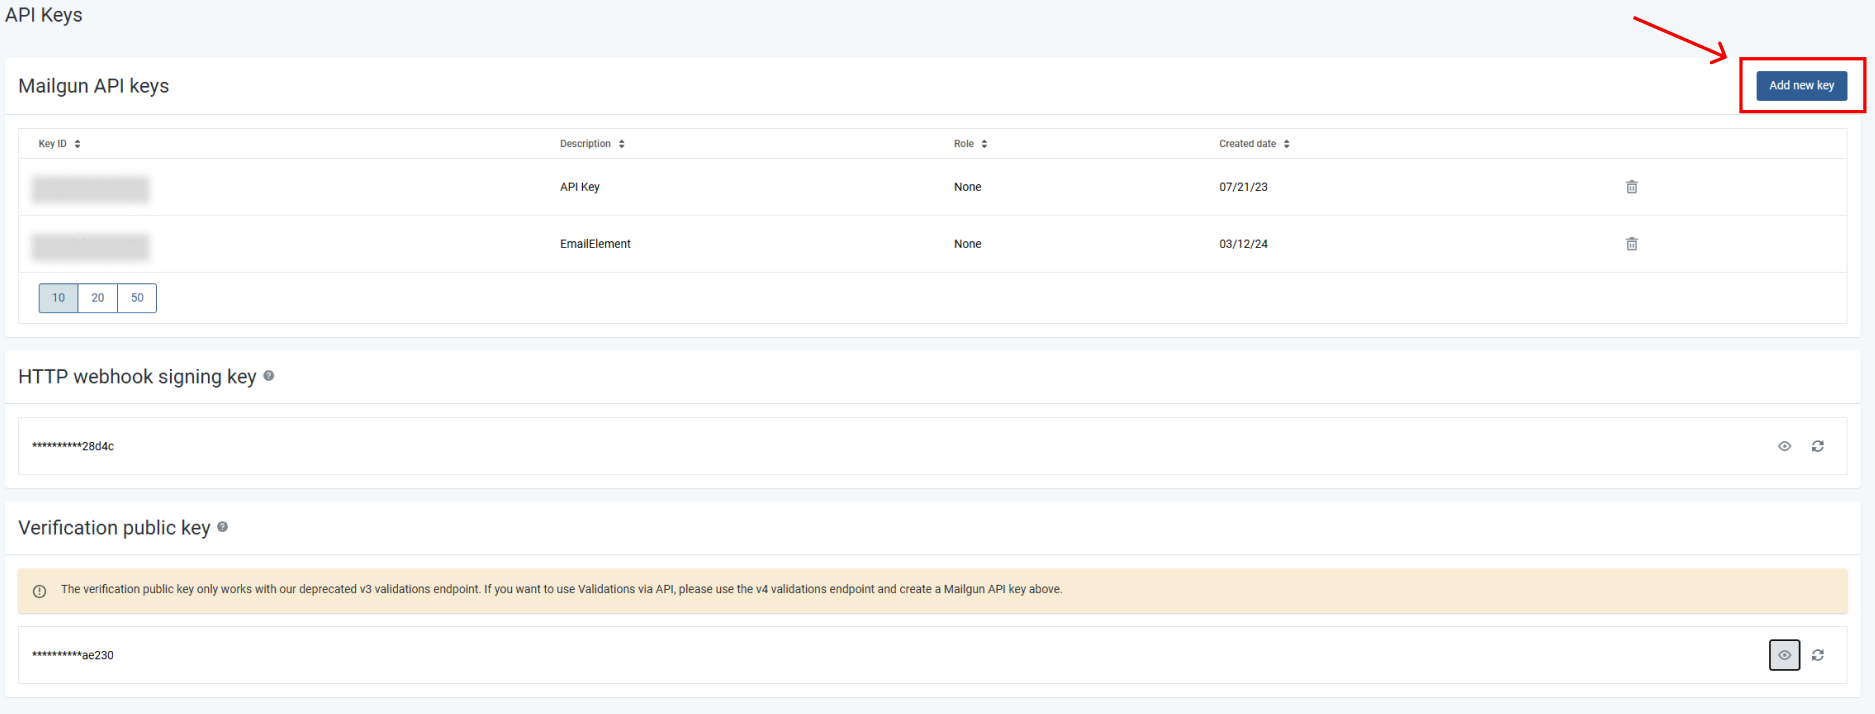
- From the Mailgun Dashboard page, select “API keys”
- Select “Add new key”
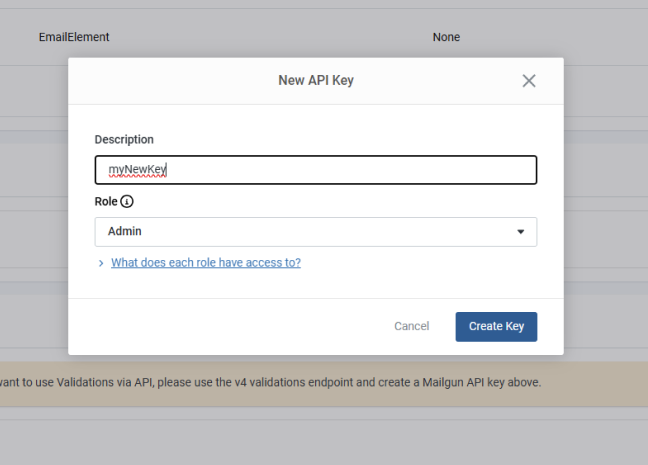
- Enter a name for your new key and select either Admin or Developer role, then hit “Create Key”
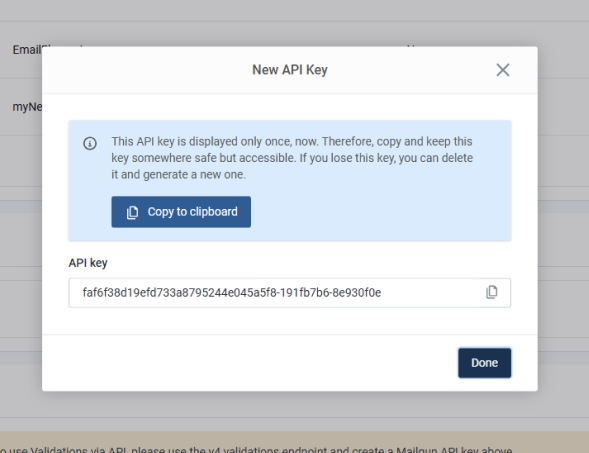
- Your new API Key will be displayed, copy it and use it when setting up your Send Integration in EmailElement
Set Up Mailgun in EmailElement
- Go to Send Integrations and create a new integration
- Integration Type: API
- ESP: Mailgun
- API Key: the private API key you copied above
- Save the integration, then click "Run Test"
Notes
- Mailgun has US and EU regions. Your domain must be in the region you pick here.
- The domain must be verified in Mailgun before it will send.