
User Management Walkthrough
Everyone who signs in to your account has a user here, and every user carries a role that decides what they can see and do.
Step 1: Open User Management
Account > User Management. Administrators see this tab; other roles do not.
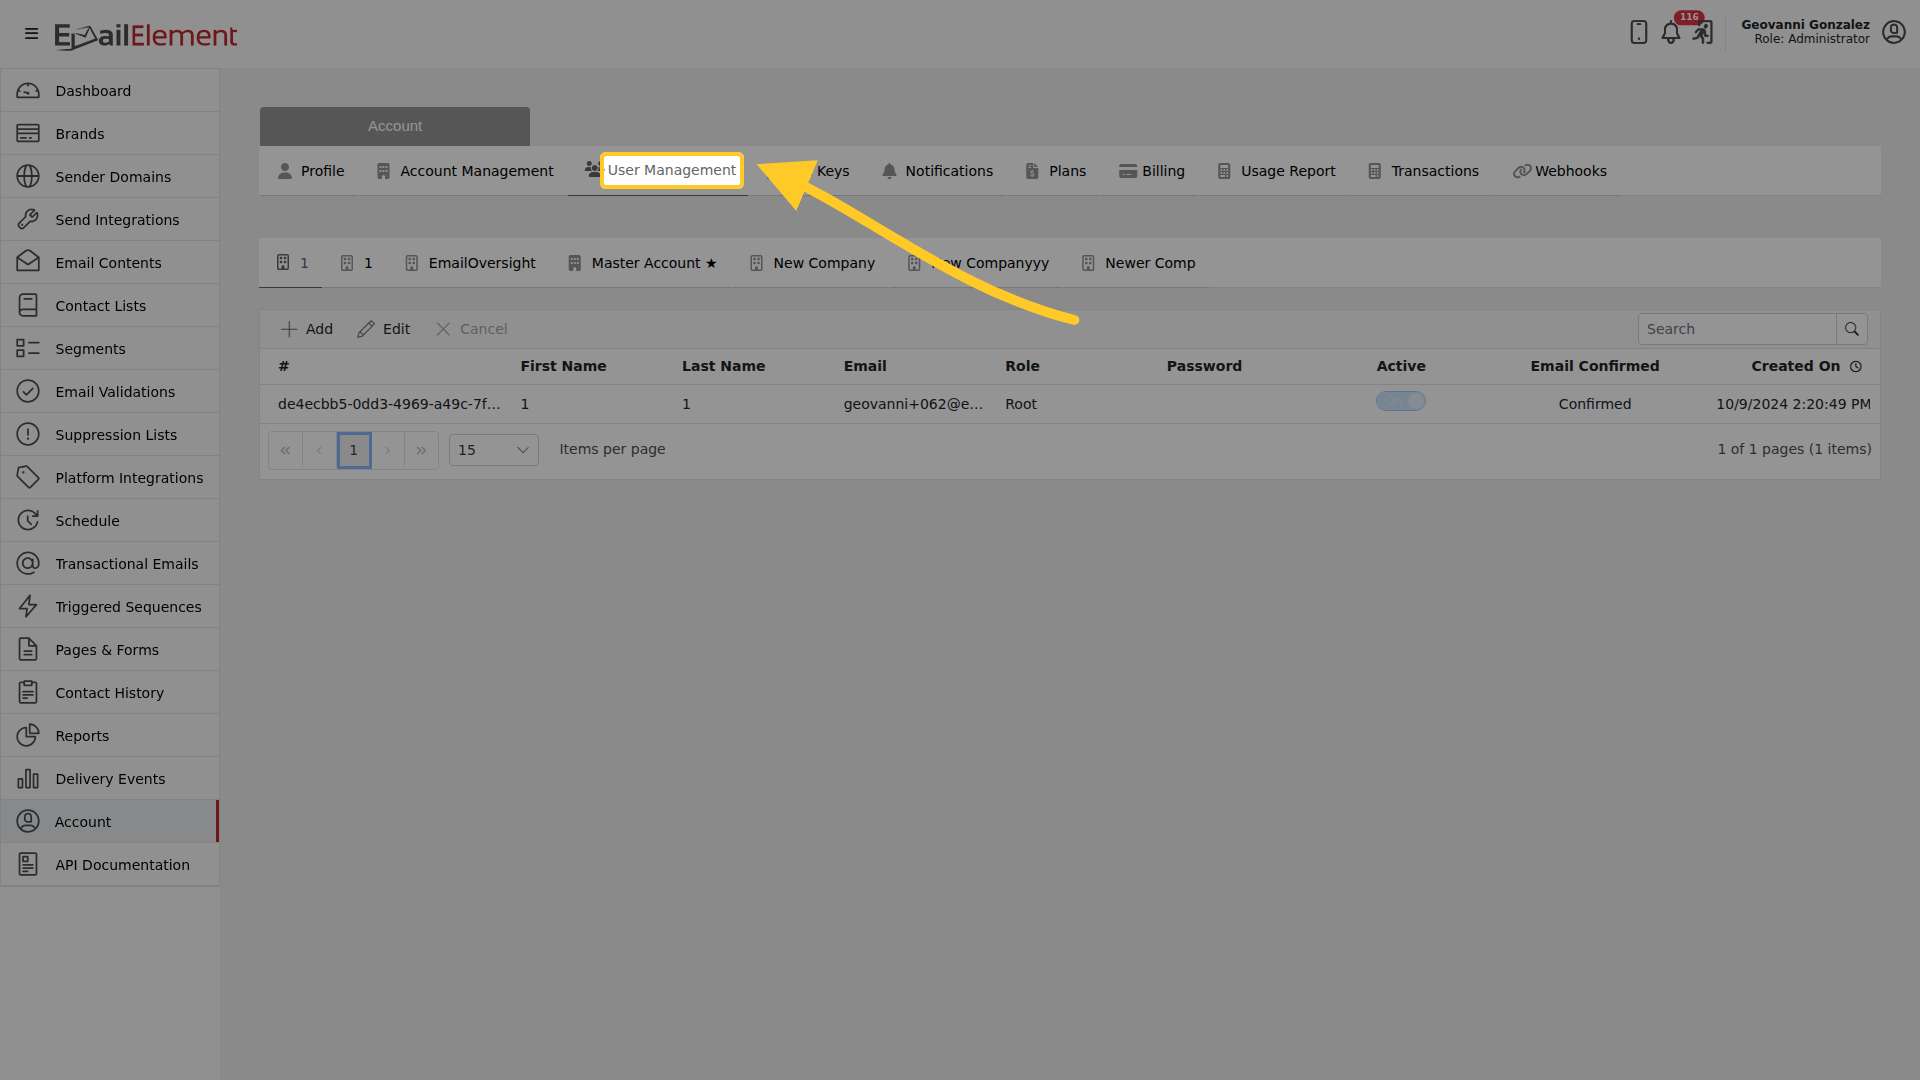
The grid lists every user on the account:
| Column | What it shows |
|---|---|
| # | The user id |
| First Name, Last Name | |
| The address they sign in with | |
| Role | One of the five roles |
| Password | Where a password can be set for them |
| Active | Turning this off stops them signing in |
| Email Confirmed | Whether they have followed the confirmation link |
| Created On | In your account time zone |
Email Confirmed is the column to check first when someone says they cannot get in. A user who has never confirmed cannot sign in, however many times the password is reset.
Step 2: Add a user
Add opens the dialog.
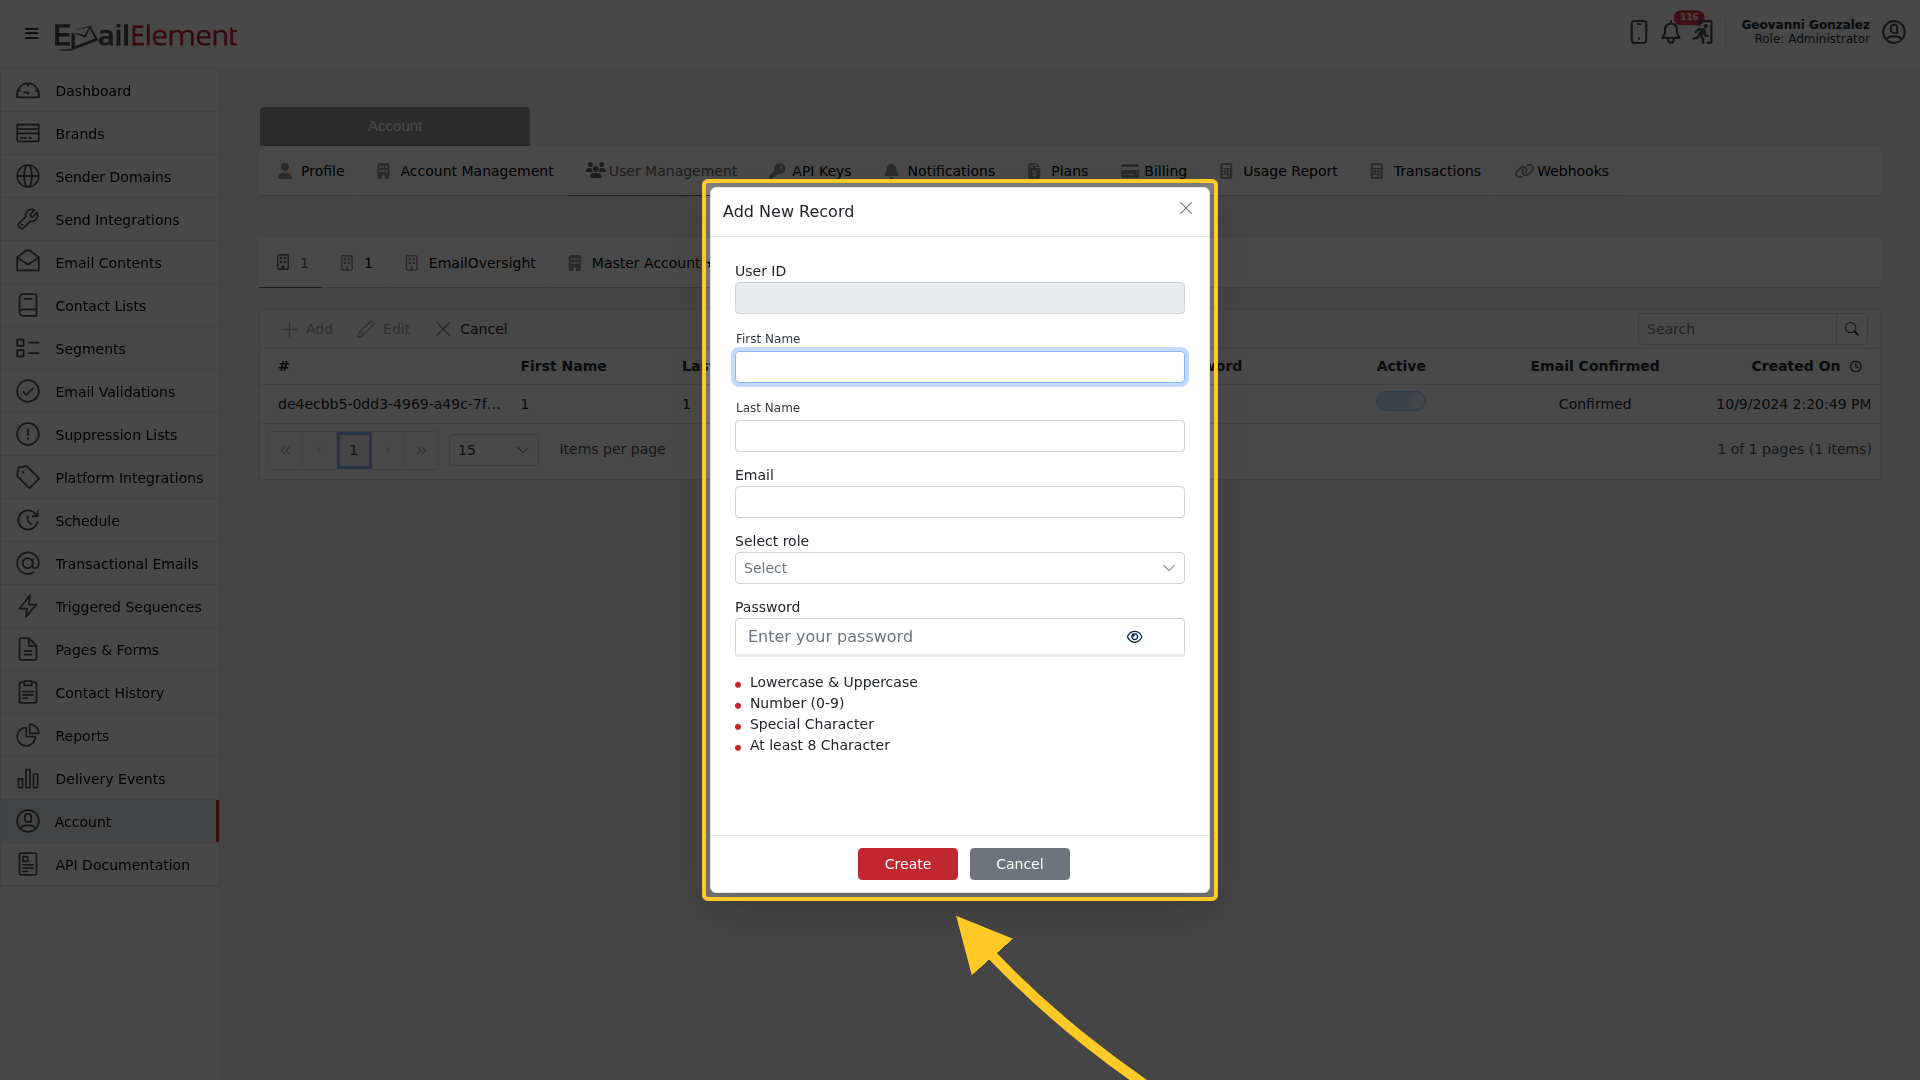
It takes User ID, First Name, Last Name, Email, Role and Password. The email address is what they sign in with, so it has to be one they can receive mail at — the confirmation goes there.
Role offers Administrator, Normal, Advanced and Restricted. Root is not in the list: it is set when the account is created and cannot be granted here.
Step 3: Change or switch off a user
Select a row and use Edit to change a name, an address or a role. A Root user cannot be edited from the grid.
To stop someone signing in, turn Active off rather than deleting the user. The row stays, so you keep the history of what they did.
Related pages
- User Roles — what each of the five roles can do